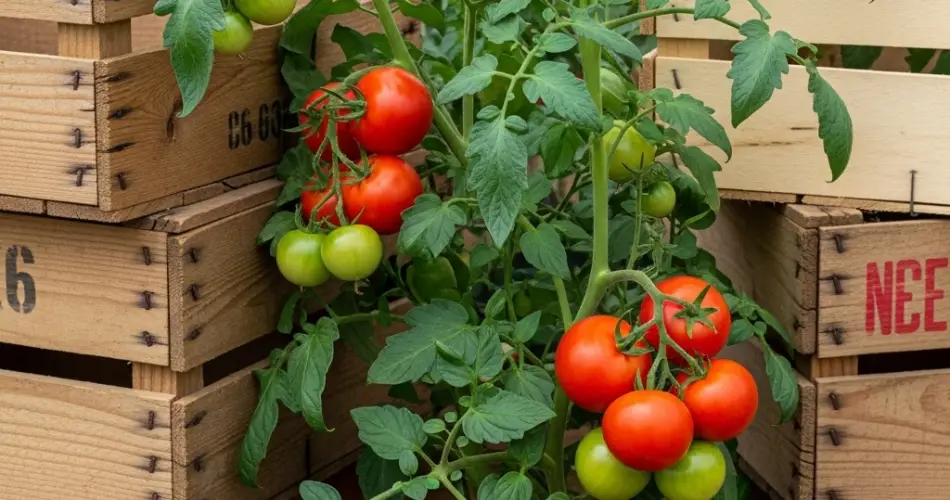
Tomatoes are one of the most rewarding crops to grow, not only because they are delicious fresh but also because they can be turned into sauces, soups, and countless other dishes. Using wooden crates as growing containers offers a practical and attractive solution for home gardeners who want to control soil quality, make the most of limited space, and still enjoy abundant harvests. With the right setup, you can take your tomatoes from crate to kitchen and enjoy homemade sauce packed with flavor.
Why Grow Tomatoes in Crates
Wooden crates provide a contained, elevated growing space that helps you avoid many soil-borne diseases and pests. They’re ideal if your backyard soil is poor, rocky, or too compact for healthy root growth. Crates are also portable, so you can move your plants to take advantage of the best sunlight or shelter them from harsh weather.
This method also allows you to plant closer to your home, making it easier to monitor growth, water regularly, and harvest when fruit is perfectly ripe. Plus, the rustic look of wooden crates adds charm to any patio, balcony, or backyard.
Choosing and Preparing Your Crate
Select a wooden crate that is sturdy and at least 18–24 inches deep, as tomatoes have deep root systems. Make sure the wood is untreated to avoid harmful chemicals leaching into the soil. If your crate has wide gaps between slats, line it with burlap, landscaping fabric, or thick paper to hold soil while still allowing drainage.
Drill several holes in the bottom if needed to prevent water from pooling, as excess moisture can lead to root rot. Place the crate in its final growing spot before filling it, as it will be heavy once loaded with soil.
Creating the Perfect Soil Mix
Tomatoes are heavy feeders and require rich, well-draining soil. A great mix for crate-grown tomatoes includes:
-
1 part high-quality garden soil for structure
-
1 part compost for nutrients
-
1 part coconut coir or peat moss for moisture retention
-
A handful of perlite for aeration
Before planting, mix in a slow-release fertilizer formulated for vegetables or add organic amendments such as worm castings and bone meal to boost nutrient content.
Planting Tomatoes in Your Crate
You can start from seed indoors 6–8 weeks before your last frost date or purchase healthy seedlings. When transplanting into your crate, bury the stem up to the first set of leaves—tomatoes form additional roots along buried stems, resulting in stronger plants.
Space plants 18–24 inches apart in larger crates to allow for airflow and prevent fungal diseases. If your crate is smaller, limit it to one plant for best results.
Sunlight and Watering Care
Tomatoes require at least 6–8 hours of direct sunlight daily. Choose the sunniest spot you have and, if possible, rotate or move the crate occasionally to ensure even light exposure.
Water deeply so that moisture reaches the root zone, but allow the top inch of soil to dry between waterings. Crates can dry out faster than garden beds, especially in hot weather, so monitor soil moisture regularly. Early morning watering is best, as it gives plants time to absorb water before the heat of the day.
Supporting and Training Your Plants
Tomatoes need strong support as they grow and produce heavy fruit. Install a stake, trellis, or tomato cage in the crate at planting time to avoid disturbing roots later. Secure stems loosely with soft ties as the plant grows, keeping fruit off the ground and improving airflow to reduce disease.
Feeding for Better Yields
For maximum harvest, feed crate-grown tomatoes regularly. Use a balanced liquid fertilizer every two weeks until flowers appear, then switch to a formula higher in phosphorus and potassium to encourage fruit development. Organic options like compost tea or seaweed extract are also excellent choices.
Preventing Pests and Diseases
Although crate gardening reduces the risk of soil-borne problems, pests such as aphids, caterpillars, and whiteflies may still appear. Inspect your plants daily and act quickly—remove pests by hand or use organic sprays when necessary.
To minimize disease risk, avoid wetting leaves when watering, prune away any yellowing foliage, and keep the space around your crate free of debris.
Harvesting and Making Your Sauce
Tomatoes are ready to harvest when they are fully colored and slightly soft to the touch. Pick them regularly to encourage the plant to keep producing. For sauce, wait until you have a large enough batch—ripe tomatoes can be stored at room temperature for a few days or refrigerated if needed.
To make a simple fresh tomato sauce, simmer chopped tomatoes with olive oil, garlic, onions, and herbs until thickened. You can freeze or jar the sauce for later use, letting you enjoy the taste of your homegrown harvest long after the season ends.
From Garden to Table
Growing tomatoes in crates is a satisfying way to produce your own ingredients for homemade dishes. With careful preparation, regular care, and a little creativity in the kitchen, you can turn your backyard harvest into flavorful sauces that capture the freshness of summer.
By following these steps—choosing the right crate, preparing nutrient-rich soil, ensuring plenty of sunlight, and maintaining consistent care—you’ll be rewarded with baskets of ripe, juicy tomatoes ready to transform into delicious meals straight from your garden.


