How to Propagate and Care for Orchids: A Complete Guide
Orchids are one of the most beloved flowers due to their exotic beauty and delicate structure. However, broken orchid branches can be disheartening for plant lovers. Fortunately, instead of discarding them, you can propagate new orchids from these broken branches with the right techniques. This guide will walk you through a step-by-step process to successfully propagate orchids and ensure their healthy growth. Additionally, we will explore how to nourish orchids to make them bloom for extended periods.
Step 1: Preparing the Broken Branch
When dealing with a broken orchid branch, the first thing to remember is not to throw it away. Many orchids can regenerate if given the proper care and environment.
- Peel off the Protective Film: The protective outer layer on the branch can sometimes hinder germination. Gently peeling it off will expose the inner tissue, making it easier for the branch to sprout.
- Identify the Right Cutting Spot: When an orchid has withered, cut off the portion that bloomed and retain the section that has the potential to sprout. Avoid cutting in a way that might damage the sprouting areas.
- Sprinkle Cinnamon Powder: Applying cinnamon powder on the freshly cut section helps disinfect the wound and promotes faster healing.
- Seal with Candle Wax: After the cut has dried, dip the end into molten candle wax. This step prevents water loss and protects the orchid from rot, ensuring a healthier propagation process.
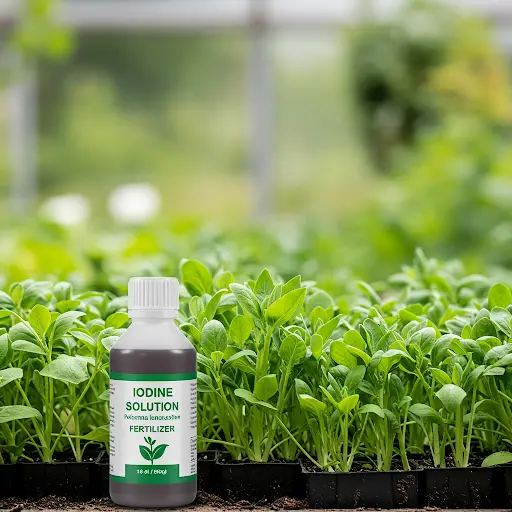
Step 2: Soaking in MSG Solution for Nutrient Absorption
MSG (monosodium glutamate) is not just a food enhancer; it also provides essential nutrients for plant growth. Orchids benefit from the high nitrogen content in MSG, which promotes healthy sprouting.
- Prepare the MSG Solution: Mix 1 teaspoon of MSG with 1 liter of water. Stir well until fully dissolved.
- Soak the Orchid Branch: Submerge the broken orchid branch in the MSG solution for 30 minutes. This step helps the branch absorb nutrients, boosting its chances of survival.
- Use the Remaining MSG Solution as a Fertilizer: Do not discard the leftover solution. Instead, use it as an organic fertilizer by spraying it evenly over the entire orchid plant. However, be cautious not to spray it on flowers, as excess nutrients might affect blooming.
- Frequency of Application: Applying this treatment once a month is ideal for maintaining overall orchid health.
Step 3: Creating a Moisture-Retaining System
Ensuring that the orchid has consistent moisture is crucial for its survival and growth.
- Use a Water Absorption Line: A water suction line is a simple yet effective way to maintain the right level of moisture for the orchid branch. Wrap a moisture-absorbing rope around the lower portion of the branch.
- Avoid Wrapping Growth Points: Be careful not to wrap the rope too tightly or in areas where new sprouts could emerge, as this could hinder growth.
- Set Up a Water Source: To maintain a steady water supply, place the orchid branch in a small plastic container filled with filtered water. The rope will continuously draw water up, ensuring the orchid remains adequately hydrated.
- Keep in a Cool Place: Place the setup in a well-ventilated area away from direct sunlight to create optimal conditions for sprouting.
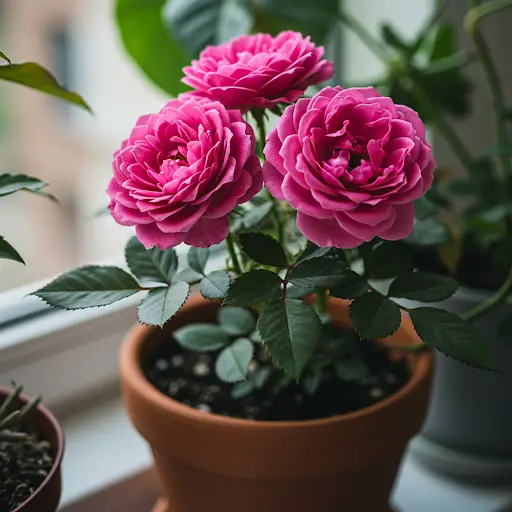
Step 4: Nourishing Orchids for Long-Lasting Blooms
Orchids can bloom for 3 to 6 months with the right care, nutrition, and watering routine. Below are the best natural fertilization techniques to keep orchids healthy and encourage longer blooms.
Making Natural Orchid Fertilizer
To create an effective natural fertilizer for orchids, follow these steps:
- Take 1 Tablespoon of Wheat Flour: Flour contains essential nutrients that support plant growth.
- Add 1 Liter of Boiled Water: Stir well and let the mixture cool.
- Filter the Residue: Once cooled, strain out the solid particles.
- Dilute to Make 3 Liters of Fertilizer: Add additional water to create a liquid fertilizer that can be used in multiple ways.
Different Ways to Apply Fertilizer
- Leaf Cleaning Method: Soak absorbent cotton in the fertilizer and wipe the top and bottom of the orchid leaves thoroughly. This helps clean the surface of the leaves, removing disease-causing fungi and insects while also delivering nutrients directly to the plant.
- Repeat Every 2 Weeks: This keeps the leaves green and healthy year-round.
- Spray Application: Pour the liquid fertilizer into a spray bottle and mist it evenly over the leaves. This method provides the same benefits as the cotton application while being quicker and easier.
- Base Irrigation: Pour the fertilizer directly at the base of the orchid, ensuring the roots absorb the nutrients efficiently. This technique is particularly effective in encouraging flowering.
- Repeat Every 14 Days: Consistent application will help orchids bloom beautifully.
- Soaking Orchid Roots: Place the orchid pot in a shallow container filled with the fertilizer solution and allow it to soak for about 1 hour. This deep hydration technique ensures that the roots absorb the maximum amount of nutrients.
- Freezing Fertilizer for Future Use: If you prepare more fertilizer than needed, you can freeze it for later use. However, do not place frozen fertilizer directly onto the orchid base, as orchids do not tolerate cold temperatures well.
Step 5: Monitoring Growth and Transplanting
After patiently nurturing the orchid branch, new sprouts will begin to emerge.
- One Month Later: Sprout Formation: Around the first month, small sprouts will appear, developing into baby orchids. The small orchid will also start forming roots, which is a sign that it is ready for the next stage.
- Transplanting into a Miniature Greenhouse: To further support growth, place the baby orchid into the recycled plastic container greenhouse you created earlier. This enclosed environment will provide warmth, humidity, and protection for the young plant.
- Maintain Moisture Levels: Regularly mist the newly transplanted orchid to ensure it does not dry out. Additionally, placing a water tray nearby can help maintain an optimal humidity level.
Conclusion
Propagating and caring for orchids is a rewarding process that allows you to enjoy their stunning beauty for extended periods. By following these steps, you can successfully revive broken orchid branches and promote long-lasting blooms with natural fertilizers. With patience and proper care, your orchids will thrive, adding natural elegance to your surroundings. Hopefully, this guide has provided you with valuable insights into orchid propagation and care!