Radishes are one of the easiest and fastest crops to grow in the home garden. With their crisp texture and peppery flavor, they are perfect for salads, pickling, or enjoying fresh from the soil. Best of all, radishes mature quickly—often in just three to four weeks—making them a satisfying choice for gardeners who enjoy quick harvests. But while radishes are simple to grow, their tiny seeds need the right conditions to sprout successfully. If the soil is too cold, too wet, or inconsistent in temperature, germination can be patchy. A creative, low-cost solution is to use recycled plastic bottles as seed starters. This eco-friendly method creates mini greenhouses that protect young radishes while giving them a head start.
Why Use Plastic Bottles for Radishes?
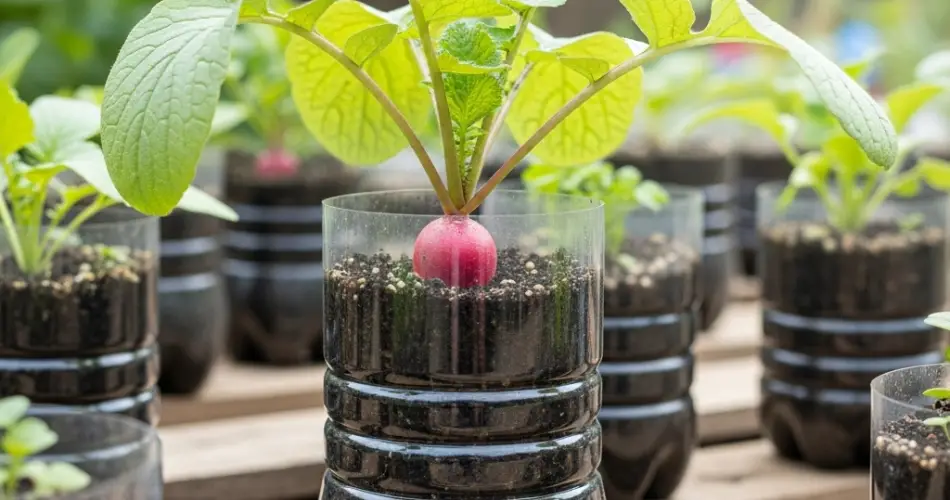
Plastic bottles make excellent germination chambers. Their clear walls allow sunlight to enter, while the enclosed space traps warmth and moisture. For radishes, which prefer cool but steady conditions, this balance is ideal. Using bottles reduces the risks of sudden temperature swings, heavy rains washing away seeds, or pests digging into the soil.
Another advantage is sustainability. Instead of throwing bottles into the trash or recycling bin, you can repurpose them into useful gardening tools. They are lightweight, portable, and adaptable, making them particularly well-suited for balcony gardens, patios, or small backyard beds.
Preparing Your Seed-Starting Bottles
-
Select Your Bottles – Choose clear, two-liter bottles for best results. They offer enough room for soil depth and root development. Wash thoroughly and remove labels to maximize light exposure.
-
Create Planting Openings – Depending on your setup, you can prepare bottles in different ways:
-
Horizontal planters: Cut a rectangular window along the side of the bottle.
-
Vertical planters: Slice small holes along the body of the bottle to plant multiple seeds.
-
Mini domes: Cut off the bottom of the bottle and use the top half to cover seeds directly in the soil.
-
-
Add Drainage – Make several small holes in the base to prevent water from collecting and drowning the seeds.
Soil Preparation
Radishes need light, well-drained soil. A mixture of garden soil, compost, and sand or perlite works well, providing both nutrition and aeration. Avoid over-fertilizing with nitrogen, as it will produce leafy tops at the expense of roots. Fill the bottles with soil, leaving a few centimeters of space at the top for watering.
Sowing Radish Seeds
Sow seeds about 1 cm (½ inch) deep, spacing them 2–3 cm (1 inch) apart if using a horizontal or vertical planter. If using bottle domes directly in the ground, sow seeds in shallow rows as usual, then place the bottle covers over them. After planting, water gently until the soil is evenly moist.
Creating the Greenhouse Effect
Once the seeds are in place, position the bottles in a sunny location. The enclosed space will trap heat and humidity, helping radishes sprout in as little as four to seven days. Keep the bottle caps on at night to retain warmth, but loosen or remove them during the day to allow airflow. This prevents overheating and reduces the risk of fungal problems.
Inside the bottle, condensation will form and drip back into the soil, recycling water and reducing the need for frequent watering. However, always monitor soil moisture and water lightly when needed.
Transitioning Seedlings Outdoors
After 10 to 14 days, the radish seedlings will be strong enough to handle outdoor conditions. To prevent shock, begin hardening them off by removing the bottles for a few hours during the day, then replacing them at night. After several days, you can remove the bottles completely.
If you are growing directly in bottles, simply allow the seedlings to continue developing where they are planted, thinning them later for proper spacing.
Thinning and Care
Once seedlings reach about 5 cm (2 inches) tall, thin them to 5–7 cm (2–3 inches) apart. This ensures that each plant has enough room to form plump, round roots. The thinned sprouts are edible and make a flavorful addition to salads or sandwiches. Continue to water regularly, keeping the soil consistently moist but not soggy.
Radishes are fast growers, and uneven watering can lead to cracked or woody roots, so aim for steady moisture throughout the growing period.
Harvesting
Depending on the variety, radishes are usually ready to harvest within three to five weeks. Pull them as soon as they reach a usable size, as leaving them too long can result in overly spicy or pithy roots. Regular harvesting also frees up space to replant and enjoy multiple rounds of radishes in a single season.
Benefits of Bottle Propagation
-
Eco-friendly: Reuses waste materials while reducing reliance on store-bought seed trays.
-
Space-saving: Ideal for balconies, patios, and container gardens.
-
Protection: Shields seeds and seedlings from pests and unpredictable weather.
-
Efficiency: Traps moisture and warmth, leading to faster germination.
-
Accessibility: Easy and affordable for both beginners and experienced gardeners.
Conclusion
Growing radishes in recycled plastic bottles is a practical, sustainable method that combines gardening with eco-conscious living. These makeshift greenhouses provide the warmth, protection, and moisture consistency that radishes need for quick, reliable germination. Whether you garden on a balcony, patio, or backyard bed, bottle propagation allows you to enjoy fresh, crisp radishes while reducing plastic waste. With just a handful of seeds, a few bottles, and some care, you can transform everyday waste into a productive source of food.


