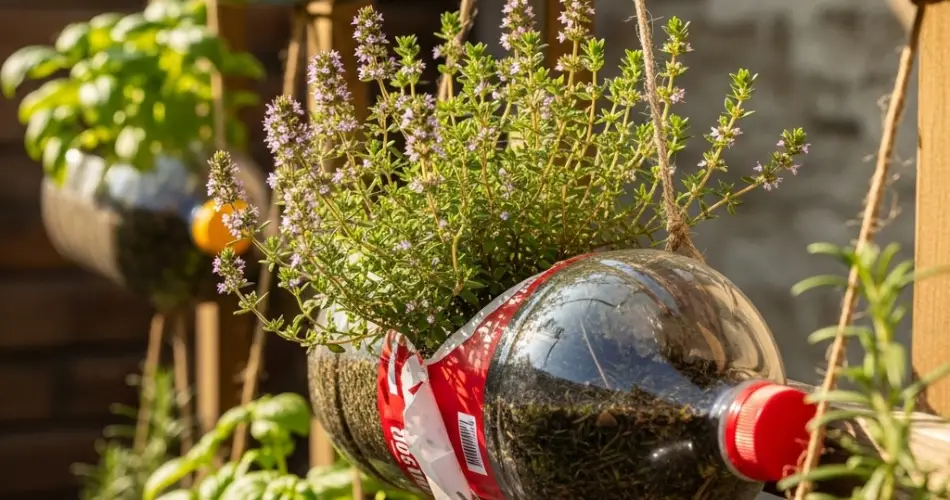
Thyme is a resilient and aromatic herb that has earned a permanent place in kitchens and gardens worldwide. With its earthy, slightly minty flavor, it complements countless dishes, from roasted vegetables to marinades and soups. Aside from being a culinary staple, thyme is also valued for its medicinal properties and pleasant fragrance. Fortunately, you don’t need a large garden or expensive equipment to propagate thyme. In fact, one of the easiest and most sustainable methods involves using repurposed bottles.
This approach allows you to recycle everyday household items while creating new plants from an existing one. Whether you’re an experienced gardener or just starting out, bottle propagation provides a simple, cost-effective, and eco-friendly way to expand your herb collection.
Why Propagate Thyme from Cuttings?
Starting thyme from seeds can be slow and unpredictable. The seeds are tiny and sometimes struggle with uneven germination. By comparison, propagation from cuttings has many benefits:
-
Speed: Cuttings root and grow much faster than seeds germinate.
-
Consistency: Each new plant is genetically identical to the parent, guaranteeing the same taste and aroma.
-
Sustainability: Reusing bottles reduces waste while giving you a practical propagation tool.
-
Affordability: One thyme plant can provide numerous cuttings, allowing you to grow many more without additional cost.
Materials You’ll Need
Before starting, gather these simple supplies:
-
A healthy thyme plant for cuttings
-
A pair of scissors or garden shears
-
Clear plastic bottles (water or soda bottles work well)
-
Fresh water or potting soil with good drainage
-
Optional: a rubber band or plastic wrap for creating humidity if you choose the soil method
Step 1: Prepare the Bottles
Choose a clean plastic bottle and wash it thoroughly. If you’re using a large bottle, cut it in half: the bottom half will hold your water or soil, and the top can be inverted to act as a mini greenhouse.
-
Water method: The bottle will simply hold fresh water.
-
Soil method: Fill the bottom half with well-draining potting mix, ideally with added sand or perlite to prevent excess moisture.
Step 2: Take Your Cuttings
Select healthy, non-flowering stems from your thyme plant. Cuttings should be about 4–5 inches long. Trim just below a leaf node (the small bump where leaves emerge). Remove the leaves from the bottom half of the cutting, leaving only a few at the top.
This ensures that the energy goes into developing roots rather than sustaining excess foliage.
Step 3: Place the Cuttings in Bottles
Now it’s time to set your cuttings:
-
Water method: Fill the bottle with just enough water to cover the stripped nodes. Make sure no leaves are submerged, as they will rot.
-
Soil method: Insert the stems into the damp potting mix, pressing gently around the base to keep them upright. Covering the container with the top of the bottle or plastic wrap can help maintain humidity, which encourages root growth.
Step 4: Provide the Right Environment
Place the bottles in a bright location with indirect sunlight. A kitchen windowsill or a bright corner indoors works well. Avoid placing the cuttings in harsh, direct sunlight, which can overheat the bottle and dry out or scorch the cuttings.
-
For water propagation, replace the water every three days to prevent stagnation.
-
For soil propagation, mist the soil lightly when it begins to dry, but avoid waterlogging.
Step 5: Watch the Roots Develop
One of the advantages of using clear bottles is that you can see the progress. With the water method, small roots usually appear in 10–14 days. For soil propagation, the first sign of success will be new leaves forming at the top of the cutting.
Wait until the roots are at least 2 inches long or the cutting feels secure in the soil before transplanting.
Step 6: Transplanting the Rooted Cuttings
When your thyme cuttings are well-rooted, move them into larger pots with drainage holes or directly into your garden if the climate permits. Thyme prefers slightly dry, well-drained soil and thrives in full sun. Be sure to water lightly after transplanting to help the roots settle.
Step 7: Caring for Your New Thyme Plants
To keep your thyme plants healthy and productive:
-
Water sparingly: Thyme is drought-tolerant and prefers soil that dries between waterings.
-
Prune regularly: Trim stems often to encourage bushier growth and prevent the plant from becoming woody.
-
Harvest frequently: Use the leaves fresh in your cooking or dry them for later use. Regular harvesting stimulates more leaf production.
-
Fertilize lightly: A diluted organic fertilizer once a month is enough for strong growth.
Final Thoughts
Propagating thyme with repurposed bottles is a straightforward, eco-friendly project that anyone can try. By recycling containers, you give plastic a second life while growing new herbs to enjoy in your kitchen. The process is quick, affordable, and rewarding, providing fresh thyme for your meals while reducing your reliance on store-bought plants or seeds.
Whether you’re gardening on a balcony, a sunny kitchen window, or a backyard, this method makes thyme propagation simple and accessible. With just a few cuttings and a recycled bottle, you can enjoy a thriving supply of this versatile herb year-round.


