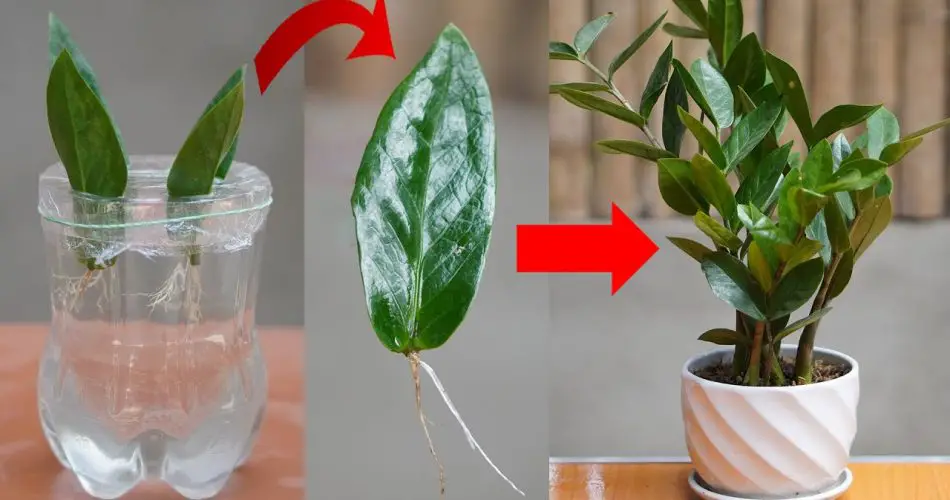
Would you like to bring the benefits of medicinal plants into your office space while also purifying the air? Propagating medicinal plants in water is a simple and effective way to achieve both goals. In this guide, we’ll walk you through the easy steps to propagate medicinal plants in water, creating a green oasis that not only enhances the aesthetics of your office but also promotes a healthier indoor environment.
Materials Needed:
- Medicinal plant cuttings (e.g., pothos, spider plant, mint, aloe vera)
- Clean glass jars or containers
- Filtered or distilled water
- Scissors or pruning shears
- Optional: Liquid plant fertilizer
Step 1: Select Your Medicinal Plants Choose medicinal plants known for their air-purifying properties and ease of propagation. Pothos, spider plants, mint, and aloe vera are excellent choices for propagating in water. Select healthy stem cuttings from existing plants, making sure each cutting has at least a few leaves and nodes (where roots will develop).
Step 2: Prepare Your Containers Clean glass jars or containers thoroughly with soap and water to remove any dirt or debris. Rinse the containers well to ensure they are free from residue. Fill each container with filtered or distilled water, leaving enough space at the top to accommodate the plant cuttings.
Step 3: Take Your Cuttings Using scissors or pruning shears, take stem cuttings from your chosen medicinal plants. Make clean cuts just below a node, ensuring each cutting is 4-6 inches long. Remove any leaves from the lower portion of the cutting to prevent them from rotting when submerged in water.
Step 4: Place the Cuttings in Water Place the stem cuttings into the prepared containers filled with water, ensuring that the nodes are submerged. Arrange the cuttings so that the leaves are above the waterline to prevent them from rotting. You can place multiple cuttings in each container, but be sure not to overcrowd them.
Step 5: Provide Adequate Light and Water Place the containers in a location with bright, indirect light, such as near a window or under fluorescent lights. Avoid placing them in direct sunlight, as this can cause the water to heat up and promote algae growth. Monitor the water level regularly and top up as needed to keep the nodes submerged.
Step 6: Wait for Roots to Develop Over the next few weeks, monitor the cuttings for signs of root development. Roots should begin to emerge from the nodes and grow down into the water. Be patient, as some plants may take longer to root than others. Once the roots are several inches long and well-established, your cuttings are ready to be potted in soil.
Step 7: Optional: Fertilize If desired, you can add a diluted liquid plant fertilizer to the water to provide nutrients for the developing roots. Follow the instructions on the fertilizer package and apply it according to the recommended frequency.
Step 8: Pot Your Rooted Cuttings Once the roots are established, carefully remove the cuttings from the water and pot them in soil. Use a well-draining potting mix and plant each cutting in its own pot. Water the newly potted plants thoroughly and place them back in their original location.
By following these simple steps, you can propagate medicinal plants in water, creating a green and healthy environment in your office space. Not only will these plants enhance the aesthetics of your workspace, but they will also help purify the air, promoting a more productive and pleasant atmosphere for everyone. Happy propagating!