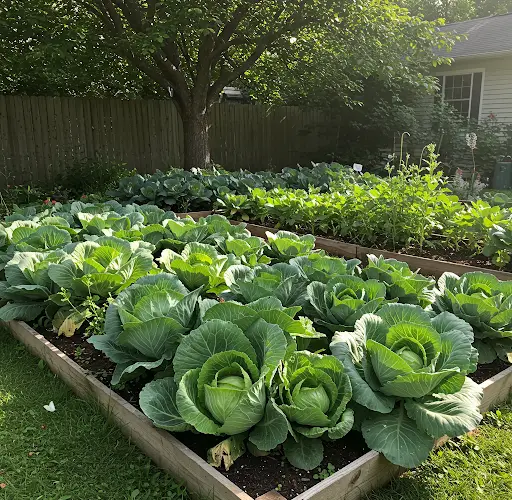
Dream Cabbage Garden at Home: I Wish I Knew About This Growing Method Sooner!
Cabbage is a nutritious, versatile vegetable that thrives in home gardens. Whether you love making fresh coleslaw, stir-fries, or soups, having a steady supply of homegrown cabbage can be incredibly rewarding. However, many gardeners struggle with common issues like pests, slow growth, and small heads. But don’t worry—by following this proven growing method, you can cultivate a dream cabbage garden with large, healthy, and delicious cabbages right at home!
In this guide, we’ll walk you through everything you need to know about growing cabbage, from seed selection to harvesting, while ensuring a bountiful harvest using simple, effective techniques.
Why Grow Cabbage at Home?
Homegrown cabbage has several advantages:
- Fresh & Chemical-Free: You control what goes into your garden, ensuring organic, pesticide-free produce.
- Saves Money: Store-bought cabbage can be expensive, especially organic varieties.
- Nutrient-Rich: Cabbage is high in vitamins C, K, fiber, and antioxidants, boosting immune health and digestion.
- Versatile Cooking Ingredient: Enjoy it raw, steamed, sautéed, or fermented into kimchi and sauerkraut.
Step-by-Step Guide to Growing Cabbage Successfully
Materials Needed:
- Cabbage seeds or seedlings (choose a high-yield variety)
- Rich, well-draining soil
- Organic compost or fertilizer
- Mulch (straw, dry leaves, or black plastic)
- Raised bed, container, or garden plot
- Watering can or drip irrigation system
- Netting or organic pest control solutions
Step 1: Choosing the Right Variety
There are several types of cabbage, each with unique flavors and growing requirements:
- Green Cabbage: The most common variety, with smooth, crisp leaves.
- Red Cabbage: Rich in antioxidants, perfect for salads and slaws.
- Savoy Cabbage: Wrinkled leaves with a mild, tender texture.
- Napa Cabbage: Also known as Chinese cabbage, ideal for stir-fries and kimchi.
Choose a variety suited to your climate and cooking preferences.
Step 2: Selecting the Best Location
- Sun Exposure: Cabbage needs at least 6-8 hours of sunlight daily.
- Soil Requirements: Prefers well-draining, nutrient-rich soil with a pH of 6.0-6.8.
- Spacing: Provide 12-18 inches between plants for proper air circulation and growth.
- Raised Beds & Containers: If space is limited, cabbage grows well in raised beds or large containers.
Step 3: Preparing the Soil
- Loosen the soil to at least 12 inches deep for strong root development.
- Mix in compost, aged manure, or organic fertilizer before planting.
- Ensure proper drainage by adding sand or perlite to heavy clay soils.
- If soil pH is too low, add lime to increase alkalinity.
Step 4: Planting Cabbage
Starting from Seeds:
- Start seeds indoors 4-6 weeks before the last frost.
- Sow seeds ¼ inch deep in seed trays or small pots.
- Keep soil moist but not soggy for even germination.
- Transplant seedlings when they have 3-4 true leaves.
Transplanting Seedlings:
- Choose a cloudy day or late afternoon to reduce transplant shock.
- Space plants 12-18 inches apart in rows 2-3 feet apart.
- Water immediately after transplanting to help roots establish.
Step 5: Watering and Mulching
- Keep the soil evenly moist but avoid overwatering to prevent root rot.
- Water 1-2 inches per week, adjusting based on weather conditions.
- Apply 2-3 inches of mulch (straw, grass clippings, or black plastic) to retain moisture and prevent weeds.
- Use drip irrigation or soaker hoses for efficient watering.
Step 6: Fertilizing for Bigger, Healthier Cabbage Heads
- Early Growth: Apply a balanced (10-10-10 NPK) fertilizer after transplanting.
- Mid-Growth: Use compost tea or a high-nitrogen fertilizer for leafy development.
- Head Formation: Switch to a low-nitrogen, high-potassium fertilizer (like 5-10-10) for firmer heads.
- Organic Boost: Apply banana peel tea or fish emulsion for natural nutrients.
Step 7: Preventing Pests and Diseases
| Problem | Cause | Solution |
|---|---|---|
| Cabbage worms | Moths laying eggs on leaves | Use row covers or hand-pick worms |
| Aphids | Sap-sucking insects | Spray neem oil or soapy water |
| Yellowing leaves | Overwatering or nutrient deficiency | Adjust watering and apply compost |
| Black rot | Bacterial infection | Remove infected plants and improve airflow |
Tip: Companion plant with marigolds, basil, or onions to repel pests naturally.
Step 8: Harvesting Cabbage for Maximum Yield
- Cabbage is ready in 70-120 days, depending on variety.
- Harvest when heads are firm and dense, about 6-10 inches in diameter.
- Use a sharp knife to cut at the base, leaving some outer leaves for regrowth.
- For continuous harvest: Leave the stem in the ground—small cabbage heads (called “cabbage sprouts”) may regrow!
Bonus Tips for a Thriving Cabbage Garden
- Rotate crops each season to prevent soil-borne diseases.
- Plant in early spring or fall for the best growth conditions.
- Use Epsom salt spray for stronger stems and greener leaves.
- Protect cabbage from extreme heat by providing shade during hot summers.
- Store harvested cabbage in a cool place to keep it fresh longer.
Final Thoughts
Growing your own cabbage at home is easier than you think! By following this proven method, you’ll enjoy large, healthy cabbage heads that are fresh, organic, and packed with nutrients. With proper care, your cabbage garden will be thriving in no time!
Try this dream cabbage garden method today and enjoy homegrown cabbage like never before!


