Thyme is one of the most beloved herbs in home gardens, prized for its earthy aroma, culinary versatility, and ability to thrive in less-than-ideal conditions. Whether you sprinkle it over roasted vegetables, add it to soups, or use it in marinades, thyme brings a touch of freshness that elevates countless dishes. The good news is you don’t need a large garden or even seed packets to grow more thyme. With a little creativity and some recycled materials, you can set up a mini bottle nursery and propagate new plants right from your existing thyme.
This simple project is budget-friendly, eco-conscious, and perfect for beginners. By reusing plastic bottles, you can create a small, controlled environment that gives thyme cuttings the best chance to root and flourish.
Why Use a Mini Bottle Nursery for Propagation?
Traditional propagation methods—like planting cuttings directly into pots—work well, but bottles offer unique advantages:
-
Recycling made useful: Repurpose bottles that would otherwise become waste.
-
Humidity control: A cut bottle functions as a mini greenhouse, maintaining warmth and moisture around the cuttings.
-
Visibility: Transparent bottles allow you to monitor root growth and soil conditions.
-
Affordability: No need to buy trays or domes; simple bottles work perfectly.
With just one thyme plant, you can create a thriving collection of new plants in no time.
What You’ll Need
To get started, gather a few basic supplies:
-
A healthy thyme plant
-
Sharp scissors or pruning shears
-
Clear plastic bottles (water or soda bottles work well)
-
Fresh water or a lightweight potting mix with sand or perlite
-
Optional: a rubber band or cling film for sealing humidity
Step 1: Prepare the Bottles
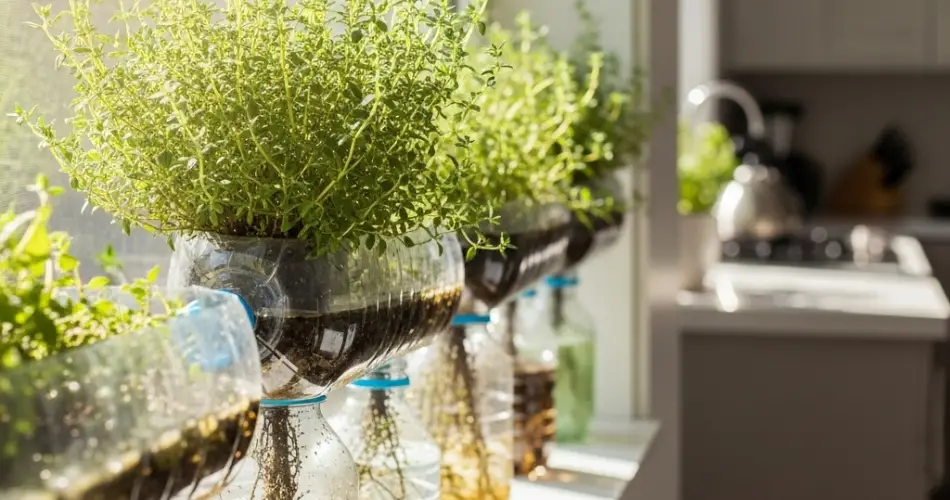
Choose bottles that are clean and transparent. Cut them in half with scissors or a craft knife. The bottom half will serve as your nursery container, while the top half can act as a humidity dome.
-
For the water method, the bottle simply holds clean water.
-
For the soil method, fill the lower half with a light potting mix that drains well. Adding sand or perlite ensures the medium won’t hold too much moisture.
Step 2: Take Healthy Thyme Cuttings
Select non-flowering stems from your thyme plant, as they root more easily than stems in bloom. Each cutting should be around 4–5 inches long. Use sharp, sterilized scissors to cut just below a leaf node. Remove the lower leaves, leaving the top few intact.
By trimming the bottom leaves, you expose the nodes, which is where the roots will emerge.
Step 3: Set Up the Mini Bottle Nursery
Place your prepared thyme cuttings into the bottles:
-
Water nursery: Add water just high enough to cover the bare nodes, ensuring no leaves are submerged.
-
Soil nursery: Insert the cuttings gently into the moist soil, firming the mix around the stems so they remain upright. Cover the top with the upper part of the bottle or cling film to lock in humidity.
This setup creates a controlled environment similar to a greenhouse, which speeds up rooting.
Step 4: Choose the Best Location
Place the mini bottle nursery in a bright spot that receives indirect sunlight, such as a kitchen windowsill or balcony ledge. Too much direct sun can overheat the bottles and stress the cuttings.
-
For water nurseries: Change the water every few days to keep it fresh.
-
For soil nurseries: Mist the soil lightly if it begins to dry, but avoid soggy conditions.
Step 5: Root Development and Monitoring
Within 10–14 days, you should notice signs of progress. With water propagation, small white roots will begin to appear at the nodes. In soil, the first indication is often new leaf growth.
Allow the roots to grow at least 2 inches long before transplanting. This ensures the young plants are strong enough to adapt to a new environment.
Step 6: Transplanting the Young Plants
When the thyme cuttings are well-rooted, move them into pots with drainage holes or directly into your outdoor garden. Thyme thrives in full sun and well-draining soil. If planting in pots, choose containers that won’t trap excess water.
Water lightly after transplanting to help the roots settle, then reduce watering to mimic thyme’s natural preference for drier soil.
Step 7: Caring for Your Propagated Thyme
To keep your new thyme plants healthy and productive:
-
Water moderately: Allow the soil to dry between watering sessions.
-
Prune often: Regular trimming encourages bushier growth and keeps the plant from becoming woody.
-
Harvest frequently: Use the leaves in your cooking to stimulate more growth.
-
Fertilize lightly: A monthly feed with diluted organic fertilizer will provide enough nutrients without overwhelming the plant.
Final Thoughts
Creating a mini bottle nursery for thyme propagation is a rewarding DIY project that combines gardening with sustainability. Instead of throwing away plastic bottles, you give them a second purpose while expanding your herb garden. The process is simple enough for beginners yet effective enough to satisfy experienced gardeners.
With just a few cuttings, some recycled bottles, and a little patience, you can transform one thyme plant into many, ensuring a steady supply of this fragrant, versatile herb for cooking and beyond.


