Potatoes are one of the most versatile vegetables you can grow at home. They store well, are easy to cook, and offer a rewarding harvest for even small spaces. While traditional potato growing requires a fair amount of ground, there’s a clever method perfect for small yards: the potato crate stack.
This approach uses a vertical stacking system to maximize yield in a compact footprint. With the right setup, you can produce a healthy crop without sacrificing precious garden space.
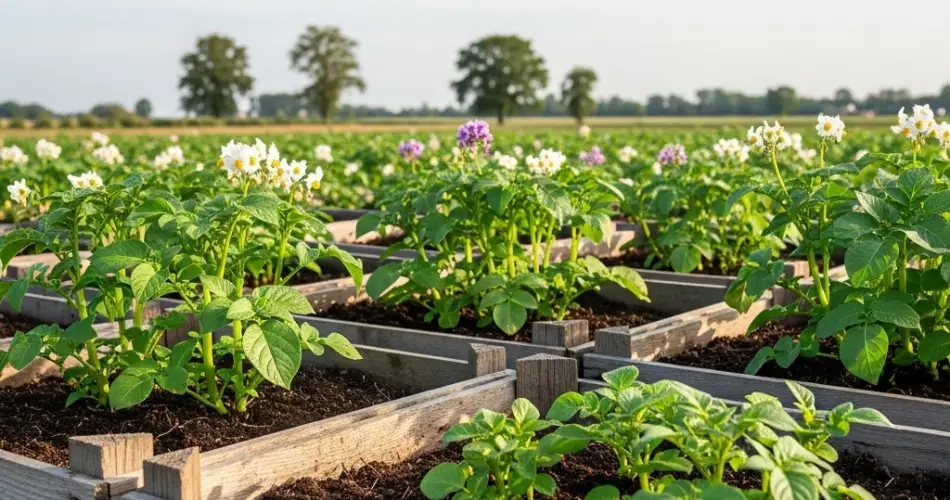
Why Use a Crate Stack for Potatoes?
Potatoes develop along the stem, meaning that if you keep adding soil as they grow, the plant will continue producing tubers higher up the stalk. A crate stack takes advantage of this natural growth habit while keeping the soil contained and easy to manage.
Benefits include:
-
Space Efficiency – Ideal for small backyards, patios, and balconies.
-
Better Drainage – Wooden crates allow excess water to escape, reducing the risk of rot.
-
Pest Reduction – Elevating potatoes can help deter certain pests like slugs and rodents.
-
Easy Harvesting – Simply remove the crates one layer at a time to access potatoes.
Materials You’ll Need
To build your potato crate stack, gather:
-
3 to 4 untreated wooden crates (sturdy enough to stack)
-
Seed potatoes of your chosen variety
-
Quality potting mix or compost-rich soil
-
Straw or mulch for covering
-
A sunny space with at least 6–8 hours of daily sunlight
If using reclaimed wood, make sure it is untreated to avoid harmful chemicals leaching into the soil.
Choosing the Right Potato Varieties
For crate stacks, early and mid-season varieties work best since they don’t need as much depth to mature. Popular choices include:
-
Early Varieties – ‘Yukon Gold,’ ‘Red Norland,’ ‘Annabelle’
-
Mid-Season Varieties – ‘Kennebec,’ ‘Purple Majesty’
Avoid late-maturing varieties unless you have deeper crates and a long growing season.
Preparing the Crates
-
Check for Drainage – Each crate should have gaps or drilled holes at the bottom to prevent waterlogging.
-
Line the Sides (Optional) – Use burlap or landscape fabric to keep soil from spilling out while still allowing air and moisture flow.
-
Stacking Plan – Start with one crate on the ground, adding more as your plants grow.
Planting Your Potatoes
-
Start with One Crate – Fill it with about 6–8 inches of loose, fertile soil.
-
Position the Seed Potatoes – Place 3–4 seed potatoes evenly spaced, eyes facing upward.
-
Cover with Soil – Add 3–4 inches of soil over the potatoes.
-
Water Lightly – Keep the soil evenly moist, but avoid soaking it.
Growing and Stacking
As potato plants grow to about 6–8 inches tall, it’s time to add another crate:
-
Add the Second Crate – Place it on top of the first and carefully fill around the stems with soil or a soil-straw mix until only the top leaves are visible.
-
Continue the Process – Repeat stacking and filling each time the plants reach 6–8 inches above the soil level.
-
Final Height – Most stacks reach 3–4 crates high. This method encourages more tuber production along the buried stems.
Watering and Feeding
-
Water Consistently – Potatoes need steady moisture to develop properly. In hot weather, check daily.
-
Avoid Overwatering – Too much water can lead to rot, especially in the lower crates.
-
Fertilize Lightly – Use a balanced fertilizer or compost tea every 2–3 weeks to encourage healthy growth without overloading nitrogen, which can lead to excessive foliage instead of tubers.
Managing Pests and Problems
-
Potato Beetles – Hand-pick beetles and larvae as soon as you see them.
-
Blight Prevention – Provide good airflow around the plants and avoid overhead watering.
-
Rodent Deterrence – If you have rodent issues, consider lining the bottom crate with fine wire mesh.
Harvesting Your Potatoes
Potatoes are ready for harvest when the foliage begins to yellow and die back.
For new potatoes:
Harvest 2–3 weeks after flowering by gently removing the lower crate and digging through the soil for smaller, tender tubers.
For mature potatoes:
Wait until the plant tops are completely dry. Remove the crates one by one, sifting through the soil to collect all tubers.
This method makes harvesting much easier than digging in the ground, and the soil from your crates can be reused in the garden after enriching it with compost.
Storage Tips
-
Cure potatoes in a cool, dry, and dark place for about 1–2 weeks to toughen their skins.
-
Store in breathable sacks or boxes in a well-ventilated, dark location.
-
Avoid refrigeration, which can turn potato starch into sugar.
Final Thoughts
The potato crate stack is a clever, space-saving method for growing a generous potato harvest in even the smallest of yards. By stacking upward instead of spreading out, you can make the most of limited gardening space while keeping the process organized and easy to manage.
With minimal materials, consistent care, and a sunny spot, you’ll be able to enjoy homegrown potatoes that taste far better than store-bought — all from a tidy vertical garden in your own backyard.


