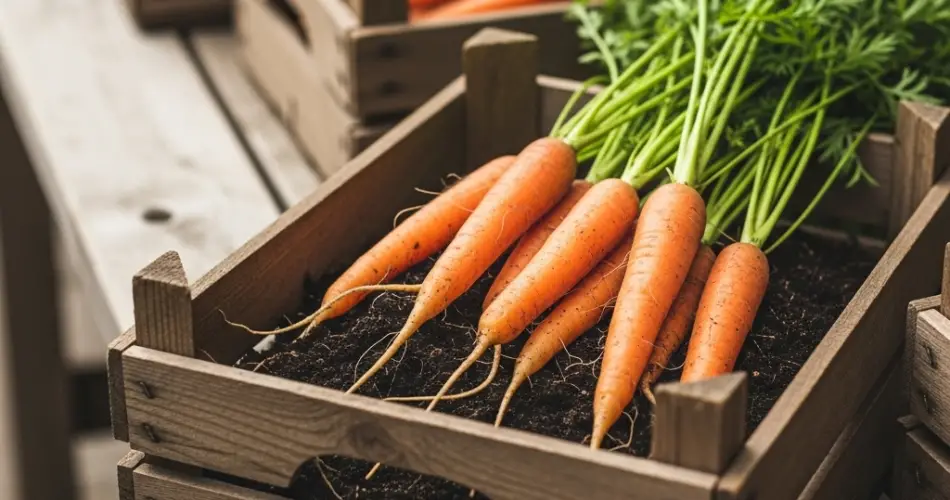
Carrots are a rewarding crop to grow at home, offering fresh, sweet, and nutrient-rich roots straight from your own backyard. While many gardeners rely on traditional garden beds, carrots can also thrive in deep wooden crates. This method is especially useful if your garden soil is rocky, compacted, or otherwise unsuitable for root crops. By using crates, you have complete control over the growing environment, allowing you to produce straight, flavorful carrots with ease.
Why Grow Carrots in Deep Crates?
Carrots develop best in loose, well-draining soil where their roots can grow downward without obstruction. Deep crates replicate these ideal conditions, eliminating many problems that arise in in-ground planting. The benefits of deep-crate carrot gardening include:
-
Better root shape — No stones or clumps to cause misshapen carrots.
-
Improved drainage — Prevents waterlogging and root rot.
-
Custom soil mix — Ensures the perfect texture for root development.
-
Portability — Crates can be placed in sunny spots or moved to avoid pests.
-
Space efficiency — Great for small yards, patios, or balconies.
Choosing the Right Crate
Carrots need depth to grow long and straight. Select a sturdy, untreated wooden crate that is at least 12 to 16 inches deep. This depth accommodates both short and long carrot varieties.
Crate preparation steps:
-
Check for drainage — Drill several holes in the bottom if needed.
-
Line the crate with landscape fabric or burlap to prevent soil loss while allowing water to pass through.
-
Elevate the crate on bricks or blocks to improve airflow and extend its lifespan.
Best Carrot Varieties for Crate Gardening
Your crate depth will help determine the carrot type you choose.
-
For deep crates (14–16 inches): Nantes, Imperator, and Danvers varieties grow long, straight roots.
-
For medium-depth crates (12 inches): Chantenay and Autumn King perform well.
-
For shallow or half crates: Choose short-rooted varieties like Paris Market or Thumbelina.
Creating the Perfect Soil Mix
Soil quality is key to growing healthy carrots. Avoid heavy clay or overly rich soil, which can lead to forked roots.
A good carrot-growing mix for crates includes:
-
50% high-quality garden soil
-
40% sifted compost
-
10% coarse sand or perlite for aeration
Mix thoroughly and sift out any large debris before filling your crate. This creates a fine, loose structure that encourages smooth root growth.
Planting Carrot Seeds
Carrots grow best when sown directly into their final container. Transplanting can damage their delicate taproots.
Planting steps:
-
Sow seeds ¼ inch deep in straight rows or a broadcast pattern.
-
Space seeds about 1 inch apart. Thin later to 2 inches apart for full-sized roots.
-
Keep the soil consistently moist during germination, which can take 1–3 weeks.
Because carrot seeds are tiny, mixing them with fine sand before sowing helps distribute them evenly.
Watering and Sunlight Needs
Carrots require steady moisture to develop tender, sweet roots.
-
Watering — Keep the soil evenly moist but not soggy. Deep watering encourages roots to grow downward.
-
Sunlight — Position crates in a spot with at least 6–8 hours of direct sunlight per day.
Avoid letting the soil dry out completely, especially during the first few weeks after germination. Uneven watering can lead to cracked or tough carrots.
Fertilizing for Root Development
Carrots prefer a balanced nutrient profile with more emphasis on phosphorus and potassium than nitrogen. Too much nitrogen results in leafy tops instead of large roots.
-
Mix a balanced, low-nitrogen fertilizer into the soil before planting.
-
Midway through the growing cycle, apply a light side-dressing of compost or a root crop fertilizer to encourage strong growth.
Pest and Disease Management
Crate gardening helps reduce pest issues, but some threats remain:
-
Carrot rust fly — Placing crates above ground can deter them. You can also use fine mesh covers.
-
Aphids — Wash off with a gentle spray of water or treat with neem oil.
-
Fungal diseases — Ensure good air circulation and avoid overhead watering.
Thinning for Better Roots
Carrots that are too close together will compete for space, producing small or misshapen roots. Once seedlings are 2 inches tall, thin them to leave at least 2 inches between plants. While it may seem wasteful, thinning ensures higher quality carrots.
Harvesting Your Carrots
Carrots can be ready anywhere from 60 to 90 days after sowing, depending on the variety.
-
Check readiness by gently pulling back soil to see root tops.
-
Harvest when roots are firm and brightly colored.
-
Loosen soil with your hand before pulling to avoid breaking the roots.
If you prefer sweeter carrots, wait until after the first light frost in cooler climates, as cold temperatures convert stored starch into sugars.
Replanting for Continuous Supply
In mild climates, carrots can be grown year-round. For continuous harvests, plant a new crate every 3–4 weeks during the growing season. Rotate your soil or refresh the mix between plantings to maintain fertility.
End-of-Season Crate Care
Once your final harvest is complete, empty the soil into the compost pile or garden bed, clean the crate, and store it in a dry area to prevent damage. Replace worn linings before the next planting season.
Final Thoughts
Deep crates offer an excellent alternative for growing carrots when ground conditions aren’t ideal. With the right crate depth, soil mix, and consistent care, you can produce straight, sweet, and flavorful carrots in your backyard, balcony, or patio. This method not only saves space but also brings fresh, homegrown produce within easy reach, season after season.


