Carrots are among the most rewarding vegetables to grow, but they need the right depth and loose soil to thrive. If you’re short on yard space, don’t worry—deep wooden crates make excellent containers for balcony carrot gardens. With proper setup and care, you can enjoy fresh, crisp carrots straight from your own compact space.
This method is perfect for urban gardeners or anyone looking to maximize small outdoor areas. Whether on a balcony, patio, or rooftop, deep crate gardening offers an efficient, low-maintenance way to grow nutritious vegetables at home.
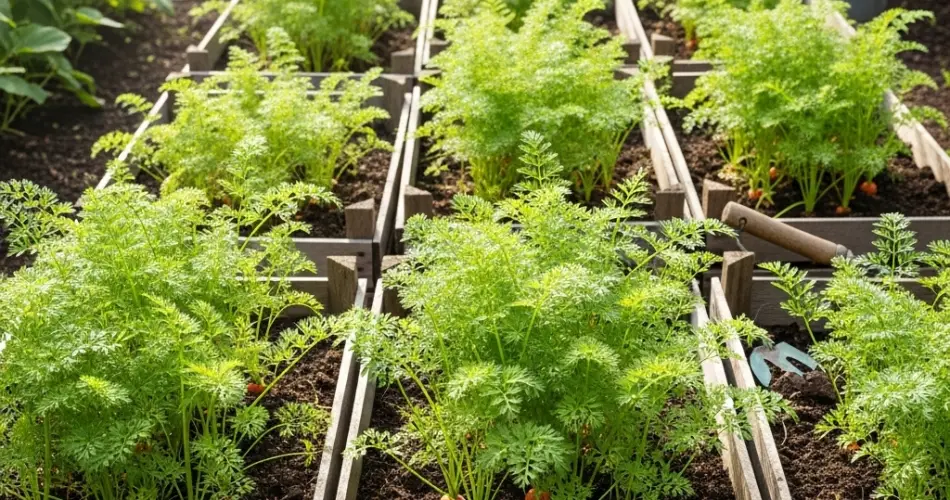
Why Use Deep Crates for Carrots?
Carrots are root vegetables, and their growth is highly dependent on having enough vertical space for the roots to elongate. Unlike leafy greens or shallow-rooted crops, carrots need loose, deep, and well-draining soil to avoid deformities or stunted growth.
Deep wooden crates—ideally 12–18 inches deep—are excellent containers for carrot planting. They provide adequate root space while remaining compact enough to fit on most balconies. You can repurpose fruit crates, build your own from untreated wood, or purchase pre-made planter boxes.
Materials You’ll Need
To get started, gather these essentials:
-
One deep wooden crate or box (at least 12 inches deep)
-
Landscaping fabric or old sacks (for lining)
-
High-quality potting mix
-
Organic compost or aged manure
-
Carrot seeds (choose varieties suited for containers like ‘Nantes’, ‘Chantenay’, or ‘Little Finger’)
-
Trowel or small hand rake
-
Watering can or gentle spray nozzle
Step-by-Step Setup
1. Prepare the Crate
Line the inside of your crate with landscaping fabric, burlap, or sackcloth to prevent soil loss while still allowing drainage. Make sure your crate has several holes in the bottom or gaps between slats to ensure water doesn’t accumulate.
2. Mix the Soil
Carrots grow best in soft, sandy, well-drained soil. Create a mix using:
-
60% potting soil (lightweight, peat-based or coconut coir)
-
30% compost or aged manure
-
10% sand or perlite (for better drainage)
Avoid using heavy garden soil as it compacts easily and may cause carrots to fork or grow unevenly.
3. Fill the Crate
Pour the soil mixture into the crate, leaving about an inch from the top for watering. Level the surface and lightly water the soil to settle it before sowing seeds.
4. Place the Crate in a Sunny Spot
Carrots need at least 6 hours of direct sunlight daily. Position the crate in a sunny area of your balcony or terrace for optimal root development and sweetness.
Sowing and Growing Carrots
1. Sow the Seeds
Sprinkle carrot seeds thinly across the surface and lightly press them into the soil about ¼ inch deep. Avoid burying them too deeply, as this may affect germination.
2. Water Gently
Mist or gently water the soil immediately after planting to avoid disturbing the seeds. Keep the soil evenly moist, but not soggy, throughout germination, which usually takes 10–14 days.
3. Thin the Seedlings
Once the seedlings reach 2 inches tall, thin them to 2–3 inches apart to give each plant enough space to form a full root. You can do this by snipping the extras at the soil line with scissors to avoid disturbing the roots of neighboring plants.
4. Ongoing Care
-
Watering: Keep the soil evenly moist but not soaked. Inconsistent watering can lead to cracked roots.
-
Feeding: If you used compost-rich soil, you may not need additional fertilizers. If needed, a diluted liquid organic fertilizer can be applied after thinning.
-
Mulching: Add a thin layer of mulch to conserve moisture and suppress weeds, especially during hot weather.
Common Issues and Solutions
-
Forked Carrots: Caused by rocks or compacted soil. Use fine, well-sifted soil and remove debris before planting.
-
Slow Growth: Usually due to lack of sunlight or overcrowding. Make sure to thin properly and place the crate in a sunny spot.
-
Pests: Carrot flies are rare in balconies but can be kept at bay with a fine mesh cover or by companion planting with onions or garlic.
Harvest Time
Depending on the variety, carrots are ready for harvest in 60 to 75 days. Check the top of the root by gently brushing back some soil. If it looks full-sized (usually about ¾ to 1 inch in diameter), it’s ready.
To harvest, grasp the greens near the base and gently pull upward. If the soil is dry or compacted, use a hand fork to loosen around the root before lifting.
Successive Planting
After harvesting, sift the soil to remove old roots and replant fresh seeds. You can enjoy multiple harvests from the same crate throughout the growing season. Just be sure to refresh the soil with compost between plantings to maintain fertility.
Final Thoughts
Growing carrots in deep crates on a balcony is both practical and satisfying. It allows anyone, even those without a garden, to enjoy fresh, homegrown carrots with a sweet crunch and rich flavor. With the right depth, soil, and sunlight, your balcony can produce vibrant carrots that rival any ground-grown crop.
Whether you’re looking to reduce grocery trips, start a small food garden, or simply explore the joys of container gardening, deep-crate carrot planting is a simple yet effective solution.


