Chili peppers are a beloved staple in kitchens worldwide, cherished for their vibrant flavors and varying levels of heat. Propagating chili plants through cuttings is an efficient way to multiply your plants while preserving the traits of a favorite variety. Using plastic bottles as propagation containers is a creative and eco-friendly technique that creates an ideal environment for cuttings to root successfully.
This article provides a comprehensive guide on how to propagate chili peppers using plastic bottle cuttings, allowing gardeners to expand their chili garden sustainably and effectively.
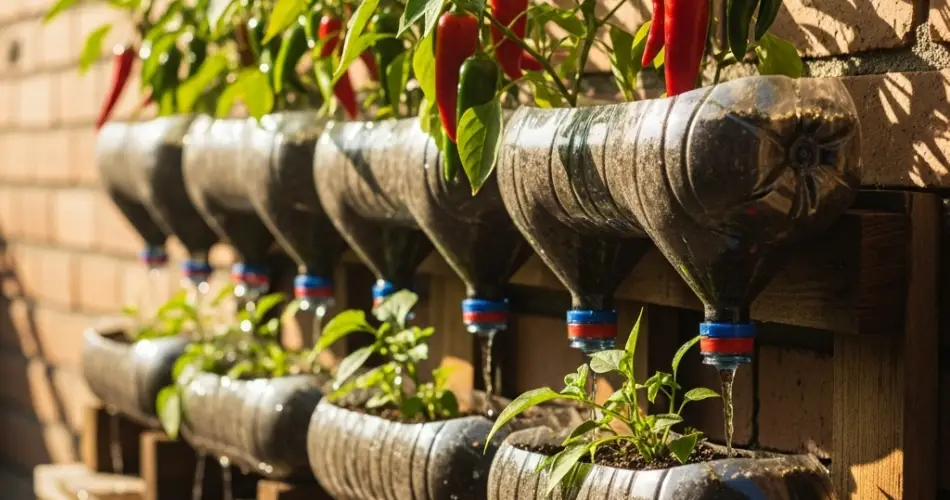
Why Use Plastic Bottles for Chili Propagation?
Reusing plastic bottles for plant propagation has numerous benefits:
-
Eco-friendly: Repurposes plastic waste, reducing environmental pollution.
-
Cost-effective: Eliminates the need to purchase specialized propagation kits.
-
Compact and space-saving: Bottles fit easily on windowsills, balconies, or small indoor spaces.
-
Mini greenhouse effect: The enclosed environment maintains humidity and warmth, essential for root development.
-
Easy monitoring: Clear plastic allows gardeners to watch roots grow without disturbing the plants.
Materials Needed
-
Clean, empty clear plastic bottles (1 or 2 liters)
-
Sharp scissors or a craft knife
-
Healthy chili pepper cuttings (4 to 6 inches long)
-
Rooting hormone powder or gel (optional)
-
Potting soil or seed-starting mix
-
Water
-
Spray bottle for misting
-
Labels or markers for tracking
Step 1: Preparing Your Plastic Bottles
Start by washing your plastic bottles thoroughly to remove dirt and residue. Remove any labels to ensure clear visibility inside the bottle.
Using sharp scissors or a craft knife, carefully cut the bottle horizontally about one-third from the top. The bottom section will hold the soil and cutting, while the top part will be inverted to serve as a humidity dome.
Create small drainage holes in the base of the bottom half to prevent excess water from accumulating and causing root rot. Optionally, add small holes to the inverted top part for ventilation.
Step 2: Preparing Chili Pepper Cuttings
Select a healthy chili plant free from disease or pests. Using clean pruning shears or scissors, cut 4 to 6-inch-long stem sections from vigorous, non-flowering shoots just below a leaf node. Roots develop best near these nodes.
Remove the lower leaves from the cutting to minimize water loss, leaving two to three leaves at the top.
Optionally, dip the cut ends into rooting hormone powder or gel to promote faster and more reliable rooting.
Step 3: Setting Up the Bottle Propagation System
Fill the bottom part of the bottle with moist potting soil or seed-starting mix. Leave about an inch of space from the rim for watering.
Make a small hole in the soil and gently insert the cutting so that the cut end is buried, ensuring the leaves remain above soil.
Firm the soil lightly around the stem to provide support.
Invert the top section of the bottle and place it over the bottom part, creating a mini greenhouse. This dome traps moisture and warmth, providing an ideal environment for root formation.
Step 4: Providing Optimal Conditions
Place your bottle cloner in a warm area with bright, indirect sunlight. Avoid direct sunlight to prevent overheating.
Maintain a temperature range between 22°C and 28°C (72°F to 82°F), ideal for chili root growth.
Regularly mist the cutting and inside the bottle to keep humidity high and reduce transpiration stress.
Step 5: Monitoring and Maintenance
Within 10 to 21 days, roots should begin to develop. The clear plastic bottle makes it easy to monitor root growth without disturbing the cutting.
Avoid overwatering; keep the soil moist but not soggy to prevent fungal diseases.
Once roots are well established, gradually introduce fresh air by slightly lifting the humidity dome for a few hours a day to harden the cutting.
Step 6: Transplanting Rooted Chili Plants
When roots reach 3 to 5 centimeters (1 to 2 inches), the cuttings are ready to be transplanted.
Carefully remove each rooted cutting from the bottle, being cautious not to damage the fragile roots.
Plant the new chili plants in pots or garden beds with fertile, well-draining soil.
Harden off plants by gradually exposing them to outdoor conditions over a week before planting in open soil.
Tips for Successful Chili Propagation with Bottles
-
Always use healthy, disease-free parent plants for cuttings.
-
Change or refresh the soil and water as needed to maintain cleanliness and reduce disease risks.
-
Label each bottle with the chili variety and date of cutting for easy tracking.
-
Avoid overcrowding; propagate one cutting per bottle for best results.
-
Provide adequate light to prevent leggy, weak growth.
-
Keep the humidity dome on until roots are formed to maintain moisture.
Common Challenges and Solutions
-
Mold or fungal infections: Improve airflow by venting the dome and reduce watering frequency.
-
Wilting or drooping cuttings: Check humidity and light conditions, mist regularly.
-
Slow or no root growth: Ensure temperature is optimal and consider applying rooting hormone.
-
Root rot: Prevent waterlogging by ensuring drainage holes are clear and watering is balanced.
Benefits of Propagating Chili Peppers with Plastic Bottles
-
Environmental impact: Promotes recycling and reduces plastic waste.
-
Fast and efficient: Provides a controlled environment for rapid rooting.
-
Genetic consistency: Cloning preserves the traits of parent plants.
-
Cost savings: No need for commercial propagation equipment.
-
Accessibility: Easy to set up and use, ideal for gardeners of all levels.
Conclusion
Propagating chili peppers using plastic bottle cuttings is a simple, sustainable, and effective way to expand your chili garden. This method takes advantage of recycled materials to create the perfect rooting environment, helping gardeners produce healthy new plants with minimal effort and expense.
By following the step-by-step instructions — preparing bottles, selecting and treating cuttings, maintaining proper conditions, and carefully transplanting rooted plants — you can enjoy a plentiful harvest of your favorite chili varieties. This bottle propagation technique supports eco-friendly gardening practices while enhancing your gardening success.


