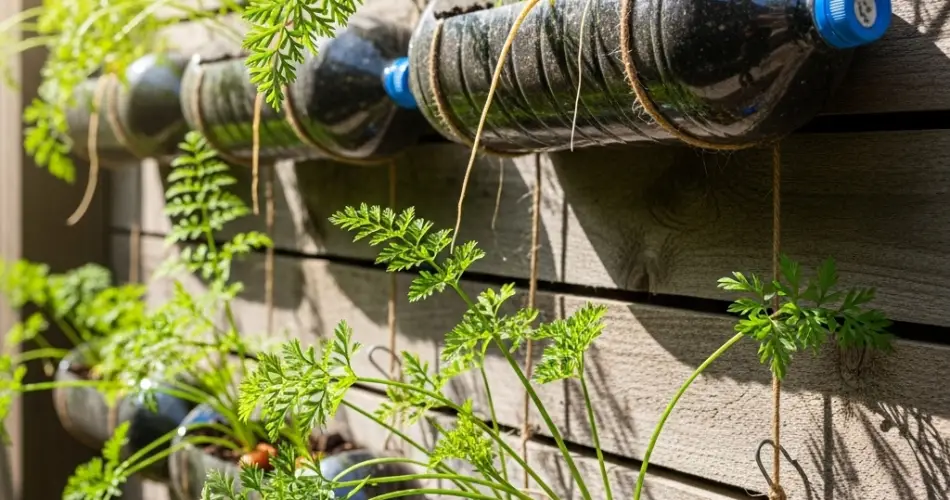
Growing carrots doesn’t always require a patch of open soil. With some creativity and a few recycled plastic bottles, you can set up a productive vertical garden right on your wall. This method not only saves space but also transforms unused vertical surfaces into lush, edible displays. By reusing bottles, you also reduce plastic waste, making this a sustainable gardening approach suitable for both urban and rural settings.
Why Grow Carrots Vertically in Bottles?
Carrots are root vegetables that thrive in loose, well-drained soil. Traditional gardens give them plenty of room to develop their long, crisp roots, but many people lack the yard space for a dedicated carrot bed. Bottle wall gardens solve this problem by offering a controlled growing environment where each carrot plant gets its own container.
With vertical growing, you can:
-
Maximize small spaces like balconies, fences, or sunny walls.
-
Avoid soil-borne pests such as nematodes.
-
Control soil quality by using a perfect carrot-friendly mix.
-
Reduce bending and weeding since the plants grow at an accessible height.
This technique is also highly decorative. A wall covered in green carrot tops creates a fresh and vibrant display, making your space both beautiful and functional.
Materials You’ll Need
To start your carrot bottle garden, gather the following:
-
Several large plastic bottles (1.5–2 liters)
-
Sharp scissors or a utility knife
-
Potting soil with good drainage
-
Fine carrot seeds (choose shorter varieties for best results in bottles)
-
String or wire for hanging bottles
-
A drill or heated nail to create drainage holes
Preparing the Bottles
-
Cut the Bottles: Using scissors or a utility knife, cut a wide rectangular opening on the side of each bottle. This will act as the planting window. Leave the top and bottom intact for stability.
-
Add Drainage Holes: Using a drill or heated nail, make several small holes in the bottom of each bottle. Proper drainage is crucial to prevent waterlogging and root rot.
-
Clean Thoroughly: Rinse each bottle well to remove any residue from drinks or previous use.
Setting Up the Vertical Garden
You can attach the bottles to a wall, wooden frame, or sturdy mesh. Arrange them in rows, ensuring that each bottle has enough space for the carrot tops to grow without shading the ones below.
-
Hanging Method: Use wire or strong string to suspend the bottles from hooks or nails.
-
Mounted Method: Secure bottles directly to a wall or frame using screws and washers.
Whichever method you choose, make sure your installation can support the combined weight of soil, plants, and water.
Preparing the Soil
Carrots prefer a light, sandy, and well-draining mix. Avoid heavy clay soils or those with large chunks of organic matter, as these can cause the roots to split or grow in odd shapes. A good carrot mix might be:
-
50% fine garden soil or loam
-
30% coarse sand
-
20% compost
Fill each bottle with this mixture, leaving a couple of centimeters at the top to prevent overflow during watering.
Sowing the Seeds
Carrot seeds are tiny, so take care when sowing:
-
Lightly moisten the soil.
-
Sprinkle seeds evenly in the planting opening.
-
Cover with a thin layer (about 0.5 cm) of fine soil or sand.
-
Mist gently to settle the seeds without washing them away.
It’s best to sow a few extra seeds in each spot and thin them later to give the strongest plants room to grow.
Caring for Your Wall-Grown Carrots
-
Watering: Keep the soil consistently moist, especially during germination. Avoid overwatering to prevent rot.
-
Thinning: Once seedlings reach about 5 cm in height, thin them to leave 3–5 cm between plants. This ensures enough room for roots to develop.
-
Light: Place your bottle wall where it receives at least 6 hours of sunlight daily.
-
Feeding: Carrots don’t need heavy fertilization. If necessary, use a diluted liquid fertilizer high in potassium once the plants are established.
Harvesting
Depending on the variety, carrots will be ready to harvest in 60–80 days. You’ll know they’re mature when the tops are full and you can see the crown of the carrot poking out of the soil. Gently loosen the soil around the root before pulling to avoid breaking it.
Tips for Success
-
Choose short or round carrot varieties, such as ‘Paris Market’ or ‘Thumbelina,’ which fit better in bottle containers.
-
Protect young plants from excessive heat by shading them during the hottest part of the day.
-
Rotate planting areas if you use the same wall for different crops to prevent nutrient depletion.
By transforming used bottles into vertical planters, you create a functional and eco-friendly gardening system. With the right care, your bottle wall can supply you with crisp, sweet carrots for months, all without needing a patch of ground.


