Growing carrots at home doesn’t require a large garden bed. With a few recycled plastic bottles and the right technique, you can produce crisp, flavorful carrots even in the smallest of spaces. This simple and sustainable method is ideal for urban gardeners, beginners, or anyone looking to make the most of their limited gardening area.
Here’s how to grow carrots in plastic bottles—an efficient way to reuse materials and enjoy fresh harvests right from your balcony, windowsill, or patio.
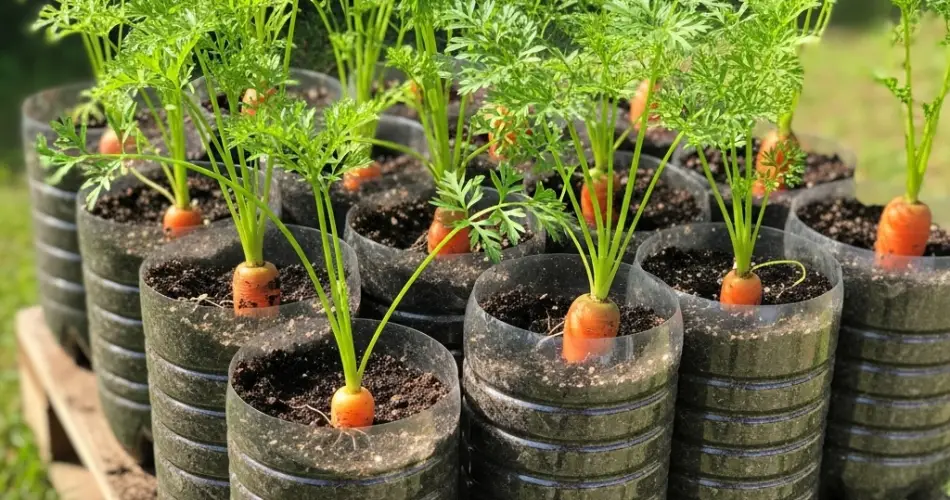
Why Use Bottles for Growing Carrots?
Carrots thrive in loose, well-draining soil and don’t need a huge footprint to grow. While their roots do need depth, many short or stubby carrot varieties are perfect for container growing. By using plastic bottles, especially those of 1.5 to 2 liters, you provide a deep, controlled environment that supports healthy root development. Plus, you’re repurposing waste, making this method both cost-effective and eco-friendly.
Materials You’ll Need
-
Clean 1.5- or 2-liter plastic bottles
-
Sharp scissors or a craft knife
-
A heated nail or small drill for drainage holes
-
High-quality potting mix (preferably loose and sandy)
-
Carrot seeds (short varieties like ‘Paris Market’ or ‘Thumbelina’ are ideal)
-
Small pebbles for drainage
-
Watering can or spray bottle
-
Twine or wire (if you plan to hang the bottles)
Preparing the Bottles
-
Clean and Dry
Wash each plastic bottle thoroughly to remove any residue, then allow them to dry completely.
-
Cut and Shape
For a vertical planter, cut off the top portion of the bottle, about 3–4 inches below the neck. If using the bottle horizontally, cut a rectangular opening along one side to create a planting window.
-
Add Drainage Holes
Use a heated nail or drill to make several holes at the bottom for water to drain out. Proper drainage is crucial to prevent root rot and ensure healthy carrot growth.
-
Optional Hanging Feature
Punch holes near the top edge and insert twine or wire if you plan to hang the bottles. Just be sure they hang securely and remain upright.
Preparing the Soil
Carrots need soft, fluffy soil so their roots can grow straight and unobstructed. Mix potting soil with a bit of sand or perlite for added drainage and air circulation. Avoid using heavy or compacted garden soil, as it can cause the roots to become stunted or deformed.
Fill the bottle with your soil mix up to about an inch from the top. Add a small layer of pebbles at the base before the soil to enhance drainage.
Sowing the Seeds
-
Spacing
Sprinkle 3–4 seeds evenly over the surface of the soil in each bottle. Once seedlings appear, thin them to 1–2 plants per bottle to allow space for root development.
-
Depth
Carrot seeds are tiny and should be planted shallowly—no more than 1/4 inch deep. Cover them lightly with soil and gently press the surface.
-
Moisture
Use a spray bottle to mist the top layer of soil to avoid displacing the seeds. Keep the soil consistently moist but never soggy.
Placement and Light
Carrots need full sun to grow well. Place the bottles where they can receive at least 5–6 hours of sunlight daily. If indoors, a sunny windowsill or balcony works great. Make sure the containers don’t get too hot, especially in direct afternoon sun, as overheating can dry out the soil quickly.
Care and Maintenance
-
Watering
Water gently and regularly, especially during hot days. The top layer of soil should stay moist during germination. Once the plants mature, reduce frequency slightly but don’t allow the soil to dry out completely.
-
Thinning
When the seedlings are about 2 inches tall, thin them to prevent crowding. This ensures each carrot has space to grow to its full size.
-
Feeding
While carrots don’t need heavy feeding, a light application of organic liquid fertilizer, such as compost tea or diluted fish emulsion, can help promote healthy growth.
Monitoring Growth
Keep an eye out for pests like aphids or slugs. Aphids can be controlled with neem oil or a mild soap solution. Also, make sure your bottles are not overheating in direct sun, as this can lead to dry, compacted soil and poor root development.
Harvesting Carrots
Depending on the variety, carrots grown in bottles are typically ready to harvest in about 60 to 75 days. You’ll know they’re ready when the tops of the carrots begin to peek out from the soil surface.
To harvest, gently grasp the foliage near the base and wiggle the carrot free from the soil. Avoid yanking, which can break the root.
Replanting and Rotating
After harvesting, remove old soil and rinse out the bottle. You can reuse it by adding fresh soil mix and planting a new batch. To reduce disease risk, alternate with leafy greens or herbs before growing another round of carrots in the same bottle.
Final Tips
-
Use short carrot varieties for best results in shallow bottles.
-
Label your bottles with the sowing date to track harvest times.
-
Group multiple bottles together for a mini carrot garden that’s easy to manage.
Conclusion
Growing carrots in plastic bottles is a smart and sustainable gardening method that works beautifully in limited spaces. It offers a satisfying way to enjoy fresh produce while recycling materials you already have. With just a few basic supplies and some patience, you’ll be enjoying crunchy, homegrown carrots straight from your upcycled garden in no time.