Oregano is one of the most versatile and beloved herbs in the kitchen. Its bold, slightly peppery taste is a staple in Mediterranean cooking, but it’s just as at home in pizzas, soups, marinades, and roasted vegetable dishes. While you can always buy oregano at the market, nothing beats the freshness and satisfaction of growing your own. The good news is that oregano is incredibly easy to propagate, and you don’t need a fancy garden setup to do it. Using simple plastic bottles, you can create a budget-friendly, space-saving propagation system that works perfectly for beginners.
This method not only gives you a steady supply of oregano but also reuses plastic bottles that would otherwise go to waste, making it both eco-friendly and cost-effective.
Why Propagate Oregano?
Propagation is the process of creating new plants from cuttings, and oregano happens to be one of the easiest herbs to multiply this way. Unlike growing from seed, which can take longer and yield unpredictable results, cuttings ensure your new plants are identical to the parent plant in both flavor and resilience.
For beginners, propagation offers several advantages:
-
Faster growth compared to seeds.
-
Reliable results because you’re replicating a healthy parent plant.
-
Space efficiency when done in containers like plastic bottles.
-
Sustainability by reusing household items.
Choosing the Right Cuttings
The first step to successful propagation is selecting healthy stems. Look for green, flexible shoots around 4–6 inches long. Avoid older, woody stems, as these are less likely to root.
Here’s how to prepare your cuttings:
-
Cut the stem just below a leaf node (the point where leaves join the stem).
-
Remove the leaves from the lower half of the cutting, leaving only a few pairs at the top.
-
Optionally, dip the cut end in water to encourage faster root formation.
This preparation ensures your cutting has the best chance to develop roots quickly.
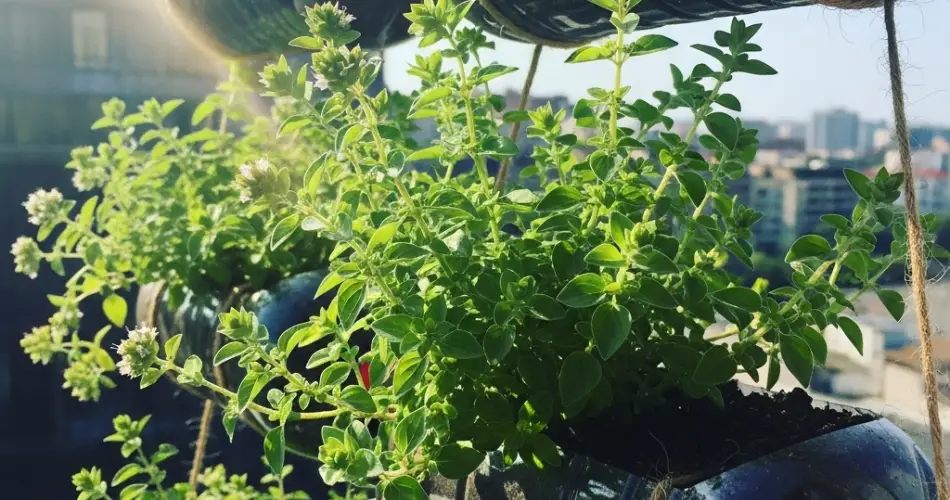
Setting Up Bottle Containers
Plastic bottles are surprisingly effective as propagation containers. They act like mini greenhouses, holding in heat and moisture while allowing light to pass through. Here’s how to prepare one:
-
Select a bottle – A 1–2 liter bottle works best.
-
Cut the bottle – Slice it in half. The bottom part will serve as the planter, while the top half can be used as a humidity dome.
-
Create drainage – Poke small holes in the base to prevent water from pooling.
-
Add soil – Fill the bottom with a light, well-draining soil mix. Oregano thrives in soil that doesn’t hold too much water.
Now you have a simple, recycled planter ready for your cuttings.
Rooting in Water vs. Soil
There are two main approaches for oregano propagation: starting in water or planting directly into soil.
-
Water method: Place the cuttings in a small jar or the cut top half of a bottle filled with clean water. Keep the nodes submerged but the leaves above water. Within 7–10 days, tiny roots should begin to appear. Once the roots reach about an inch long, transfer the cuttings into soil.
-
Soil method: Insert cuttings directly into the prepared bottle planter. Water lightly and cover with the top half of the bottle to maintain humidity. This method eliminates transplant shock, but rooting may take slightly longer.
Both methods are effective, so choose whichever works best for your space and preference.
Caring for Young Oregano Plants
After transplanting or planting, place your bottle containers in a location that receives plenty of sunlight—about 6 hours daily. Oregano loves warmth and light, so a sunny windowsill, balcony, or patio is ideal.
Key care tips include:
-
Watering: Allow the soil to dry slightly between waterings. Oregano prefers drier conditions to prevent root rot.
-
Pruning: Pinch off the tips of new growth to encourage bushier plants.
-
Air circulation: If you’ve covered your bottle with the top half for humidity, remove it once new growth appears to prevent mold.
Harvesting and Using Oregano
Once your oregano has grown strong and leafy, you can begin harvesting. Snip stems as needed, cutting just above a leaf node to encourage continued growth. Regular harvesting not only keeps the plant producing but also ensures you always have fresh oregano on hand.
Fresh oregano is perfect for immediate use in cooking, but you can also dry it for later. To dry, bundle a few stems together and hang them upside down in a cool, dark place. Once dry, crumble the leaves and store them in an airtight jar.
The Benefits of Bottle-Based Gardening
This method of propagation has several unique advantages for beginners:
-
Affordability: No need to buy new pots—bottles are free and widely available.
-
Eco-friendliness: Repurposing plastic helps reduce waste.
-
Convenience: Bottle planters are lightweight, portable, and perfect for small spaces.
-
Educational value: It’s a great way to learn about plant life cycles in a hands-on way.
Final Thoughts
Oregano is one of the easiest herbs to propagate, and with nothing more than a few plastic bottles and some cuttings, you can grow a thriving supply right at home. This simple method is budget-friendly, sustainable, and perfect for beginners who want to enjoy fresh herbs without the need for a large garden.
Whether you’re looking to enhance your cooking, practice eco-friendly gardening, or just enjoy the satisfaction of growing plants from scratch, bottle-based oregano propagation is an excellent place to start. In just a few weeks, you’ll have your own thriving herb garden—all from a humble stem cutting.


