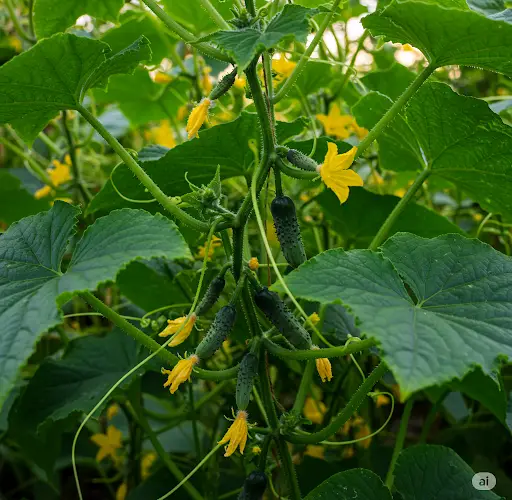
Cucumbers are a favorite among home gardeners for their crisp texture and refreshing flavor. However, getting a strong, healthy crop often requires more than just planting seeds and hoping for the best. Fortunately, there’s a simple, natural method that can dramatically speed up sprouting, encourage lush growth, and result in a rich harvest — and it starts right after planting.
The Secret? A Simple Nutrient-Rich Solution
After sowing cucumber seeds or transplanting seedlings into your garden or greenhouse, the first few days are critical. During this time, the plant must adjust to its environment, and the roots must begin developing rapidly. To support this early growth, you can apply a homemade, organic solution that delivers vital nutrients directly to the root zone.
This post-planting mixture is easy to prepare, uses inexpensive ingredients, and can significantly improve germination rates, boost shoot development, and increase overall yield.
What You’ll Need
To prepare this effective solution, you’ll need:
-
1 tablespoon of baking soda (sodium bicarbonate)
-
1 tablespoon of hydrogen peroxide (3% solution)
-
1 liter of warm water (around 30°C / 86°F)
Each ingredient plays a vital role in strengthening young cucumber plants.
Why This Works
-
Baking soda helps to neutralize harmful fungi and bacteria in the soil. It also raises the pH slightly, discouraging diseases that thrive in acidic conditions.
-
Hydrogen peroxide adds oxygen to the soil, which promotes faster root development and improves the plant’s ability to absorb nutrients.
-
Warm water stimulates germination and helps dissolve the components for even distribution in the soil.
Together, these ingredients create a balanced environment that gives young cucumber plants the best possible start.
How to Apply the Solution
-
Mix the ingredients. In a container, combine the baking soda and hydrogen peroxide with 1 liter of warm water. Stir until fully dissolved.
-
Apply immediately after planting. Once you’ve placed the seeds or seedlings in the soil, pour approximately 100-150 ml of this solution over the planting area for each cucumber plant. Make sure the soil is moist but not overly saturated.
-
Repeat after 5–7 days. This second application reinforces the early effects and ensures the growing roots continue to receive nutrients and protection.
Additional Tips for Stronger Plants
To further support cucumber growth and increase your harvest, consider the following complementary practices:
-
Soil preparation: Before planting, enrich the soil with compost or well-rotted manure. Cucumbers thrive in nutrient-rich, loose soil with good drainage.
-
Consistent watering: Keep the soil evenly moist, especially during flowering and fruiting. Avoid waterlogging, which can cause root rot.
-
Mulching: Applying mulch helps retain moisture, suppress weeds, and maintain a stable soil temperature.
-
Vertical support: If space is limited, consider growing cucumbers on a trellis or netting. This improves air circulation and makes harvesting easier.
-
Feeding: About 2–3 weeks after planting, start feeding with a diluted organic fertilizer rich in potassium and phosphorus to encourage flowering and fruit development.
Benefits You’ll Notice
By using this simple nutrient solution after planting, you should begin to notice:
-
Faster sprouting of cucumber seeds
-
Quicker shoot development
-
Stronger root systems
-
Healthier foliage with vibrant green color
-
More abundant flowering
-
Larger and more frequent harvests
Many gardeners report that their cucumber plants look visibly stronger within a week of applying the solution, with earlier blooming and more uniform fruits.
A Natural Boost Without Chemicals
This method stands out because it relies on simple, natural ingredients that are safe for both plants and the environment. It’s particularly appealing to organic gardeners who want to avoid synthetic growth stimulants or harsh chemical fertilizers.
Best of all, it only takes a few minutes to prepare and apply — and the results can transform your cucumber patch into one of the most productive areas in your garden.


