Chili peppers are a versatile and vibrant addition to any home garden, prized for their bold flavor, spiciness, and nutritional benefits. They are rich in vitamins A and C, antioxidants, and capsaicin, which offers health benefits such as boosting metabolism and supporting cardiovascular health. For gardeners with limited space, growing chili peppers in buckets is an excellent solution, allowing for control over soil, water, and sunlight. This beginner-friendly guide provides practical tips for cultivating chili peppers successfully in containers.
Why Container Gardening Works for Chili Peppers
Chili peppers are ideal for container gardening because they thrive in well-draining, nutrient-rich soil and can be easily managed in small spaces. Buckets allow for precise control over water and fertilization, reducing the risk of root rot and nutrient deficiencies. Container-grown peppers are also easier to monitor for pests and diseases, and harvesting fruit is convenient, making them perfect for balconies, patios, or urban gardens.
Choosing the Right Chili Pepper Variety
Selecting the right variety is crucial for container gardening. Compact or dwarf chili varieties are best suited for buckets, as they produce abundant fruit without requiring excessive space. Popular container-friendly varieties include “Cayenne,” “Jalapeño,” “Tabasco,” “Thai Hot,” and “Numex Twilight.” For beginners, starting with mild to moderately hot varieties is ideal, as they are easier to manage and harvest. Choosing the right variety ensures healthy plants and productive yields, even in limited space.
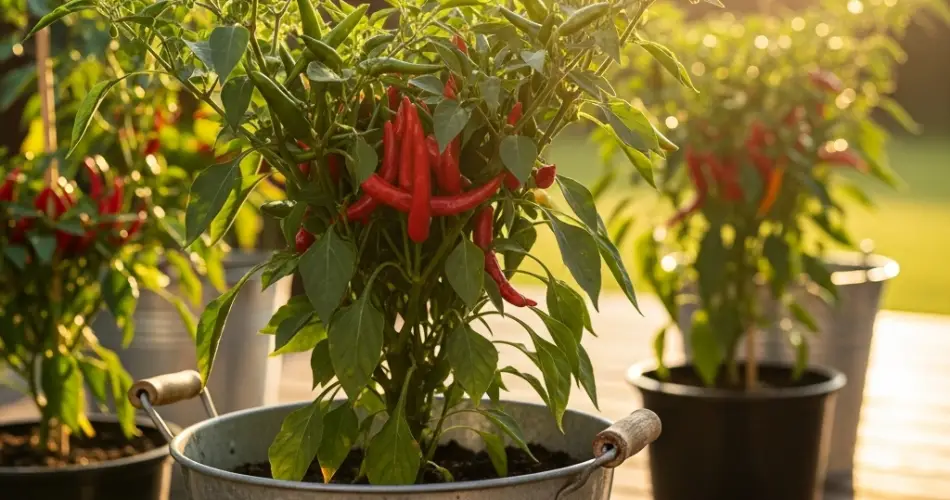
Selecting and Preparing Buckets
Choose a bucket that is at least 12 inches deep and wide enough to accommodate a single plant comfortably. Larger containers can hold multiple plants if spaced properly. Ensure the bucket has drainage holes at the bottom to prevent waterlogging, which can damage roots. For better drainage, place a thin layer of gravel or small stones at the bottom before adding soil. Clean the buckets thoroughly to remove residues and reduce the risk of disease.
Soil Preparation
Chili peppers thrive in loose, well-draining soil with a slightly acidic to neutral pH (6.0–7.0). Use a high-quality potting mix enriched with compost or well-rotted organic matter. Compost provides essential nutrients, while perlite or sand improves drainage and prevents soil compaction. Avoid heavy garden soil, which can restrict root growth and reduce fruit production. Proper soil preparation ensures strong root systems and vigorous plant growth.
Planting Chili Peppers in Buckets
Chili peppers can be grown from seeds or young seedlings. For seeds, start indoors 8–10 weeks before the last frost. Sow seeds about ¼ inch deep in a seed-starting mix, keeping them warm and moist until germination, which typically occurs within 7–14 days. Transplant seedlings into buckets once they have at least two sets of true leaves. Plant them at the same depth they were growing in their nursery pots and water thoroughly to settle the soil around the roots.
Sunlight Requirements
Chili peppers require full sun to thrive, ideally receiving six to eight hours of direct sunlight daily. Place the bucket in a sunny location, such as a balcony, terrace, or rooftop. Adequate sunlight promotes strong stems, healthy leaves, and abundant fruit production. In hot climates, partial afternoon shade can help prevent leaf scorching while maintaining vigorous growth.
Watering and Care
Consistent watering is key for container-grown chili peppers. Keep the soil evenly moist but not waterlogged. Water when the top inch of soil feels dry, and avoid splashing water on the foliage to reduce the risk of fungal diseases. Mulching with straw or shredded leaves helps retain moisture, regulate soil temperature, and suppress weeds. Regularly remove yellowing or damaged leaves to maintain plant health and airflow.
Fertilization
Chili peppers benefit from regular feeding to support growth and fruiting. Use a balanced, slow-release fertilizer or liquid compost tea every two to three weeks during the growing season. Fertilization encourages strong stems, lush foliage, and vibrant fruit. Avoid excessive nitrogen fertilization, as it may promote leafy growth at the expense of fruit production.
Harvesting Chili Peppers
Chili peppers can be harvested once they reach the desired size and color, which varies depending on the variety. Frequent harvesting encourages continuous production. Use scissors or garden shears to cut the fruit from the plant carefully, leaving a short stem attached. Harvesting in the morning ensures fresh, flavorful peppers and reduces plant stress.
Advantages of Container Chili Pepper Gardening
Growing chili peppers in buckets maximizes limited space, simplifies soil and water management, and reduces pest and disease problems. Containers are portable, allowing gardeners to reposition plants for optimal sunlight or protect them during extreme weather. Container-grown peppers are easy to maintain, harvest, and enjoy, making them a perfect choice for beginner gardeners and urban spaces.
Conclusion
Bucket gardening allows gardeners of all levels to cultivate chili peppers successfully in small spaces. By choosing the right variety, preparing nutrient-rich soil, providing adequate sunlight, and maintaining consistent watering and fertilization, you can enjoy a healthy, productive crop of chili peppers year-round. Container-grown chili peppers offer convenience, flavor, and the satisfaction of harvesting fresh, homegrown vegetables straight from your balcony or patio garden.


