Few herbs can match the subtle but unmistakable aroma of bay leaves. Their earthy, slightly floral flavor enhances stews, soups, sauces, and marinades, making them a must-have in kitchens worldwide. While many people rely on store-bought dried leaves, nothing compares to having your own bay laurel plant within reach. The good news is that this evergreen tree, Laurus nobilis, can be successfully grown in pots, giving you a steady supply of fresh and dried leaves right at your fingertips. Even in small spaces, a potted bay plant can thrive for years, providing beauty, fragrance, and endless culinary possibilities.
Why Grow Bay Laurel in Pots?
Bay laurel is naturally a slow-growing tree that, if left in the ground, can eventually reach impressive heights. However, grown in pots, it remains manageable and compact. Containers also allow you to move the plant as needed, whether to capture more sunlight, shield it from frost, or bring it indoors during the winter months. For urban gardeners or those with limited outdoor space, growing bay in pots is the most practical way to enjoy this long-lived, flavorful herb.
Another advantage is flexibility. With portable pots, you can keep a bay plant on your balcony in summer and move it to a sunny windowsill or greenhouse in winter. This mobility ensures that the plant receives optimal conditions year-round.
Choosing the Right Pot and Soil
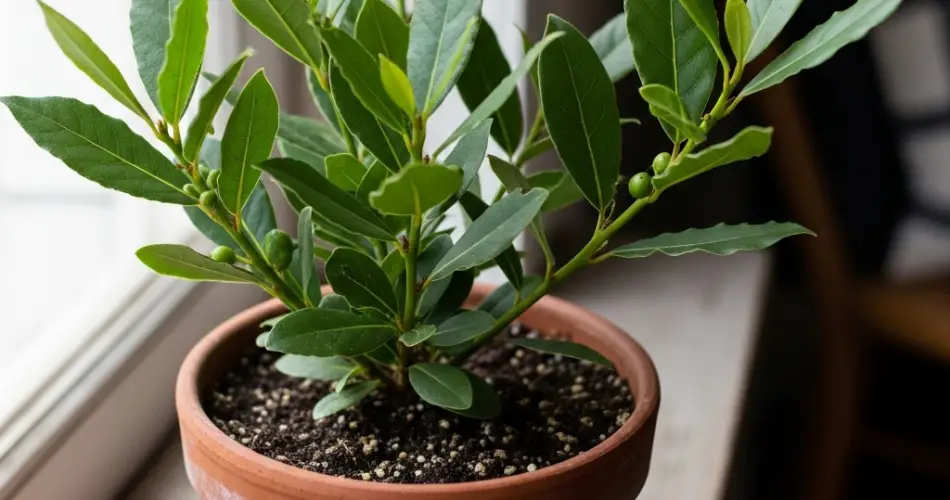
Bay laurel develops strong root systems, so choose a sturdy pot at least 12–16 inches deep and wide. As the plant matures, repotting every few years into larger containers will help maintain its health. Terracotta or ceramic pots are excellent choices, as they provide stability for a plant that can grow for decades. Drainage holes are essential to prevent soggy roots, which can lead to rot.
For soil, bay thrives in a light, well-draining mix. A combination of high-quality potting soil, compost, and a bit of sand or perlite works perfectly. This blend provides the nutrients the plant needs while ensuring that excess water can drain away.
Planting Your Bay Laurel
Although bay can be grown from seed, it germinates slowly and requires patience. Most gardeners start with a small sapling purchased from a nursery. To plant, position the young tree in the center of the pot, add your soil mix around the roots, and press gently to eliminate air pockets. Water well to settle the plant into its new container.
Because bay grows slowly, you won’t need to worry about frequent repotting. However, every two to three years, refresh the soil and move the plant into a slightly larger container to support healthy growth.
Sunlight and Temperature Needs
Bay laurel loves warmth and light. Place your pot where it will receive at least 6 hours of direct sunlight daily. Outdoors, a sunny patio or balcony is ideal, while indoors, a south-facing window provides the best light. If natural light is limited, consider supplementing with a grow lamp.
This Mediterranean native thrives in mild climates but is sensitive to frost. If you live in an area with cold winters, move your plant indoors or to a sheltered spot once temperatures begin to drop. Bay laurel tolerates indoor conditions well, provided it receives enough light and is kept away from drafts.
Watering and Feeding
Bay laurel prefers soil that is consistently moist but never waterlogged. Water thoroughly when the top inch of soil feels dry, then allow excess water to drain away. During the hot summer months, more frequent watering may be needed, while in winter the plant requires less.
Feeding bay helps maintain lush, green leaves. Apply a balanced liquid fertilizer every 4–6 weeks during the growing season. Organic options like compost tea or seaweed extract also work well. Reduce feeding during the cooler months when growth naturally slows.
Pruning and Maintenance
Pruning keeps potted bay manageable and encourages bushier growth. Trim back leggy stems in spring or early summer, shaping the plant as desired. Many gardeners enjoy training bay into topiary forms, though for culinary use a simple rounded shape works well. Remove any yellow or damaged leaves to keep the plant healthy.
Check regularly for pests such as aphids, scale insects, or spider mites. These can be managed with insecticidal soap, neem oil, or a gentle spray of water. Ensuring good airflow around the plant also helps prevent problems.
Harvesting Bay Leaves
One of the best things about bay laurel is that you can harvest leaves at any time of year. Mature, dark green leaves provide the richest flavor. Simply snip leaves as needed, making sure not to strip the plant bare. Harvesting encourages new growth, so don’t be afraid to pick regularly.
Fresh leaves can be used immediately, but many cooks prefer dried bay for its more concentrated aroma. To dry, spread leaves in a single layer in a warm, shaded area until fully dehydrated, then store them in an airtight container. Properly dried bay leaves can last up to a year without losing their distinctive fragrance.
Culinary Uses
Bay leaves are incredibly versatile. Add them to soups, stocks, stews, and sauces for a subtle depth of flavor. They pair beautifully with meats, fish, legumes, and even pickling recipes. Always remember to remove the leaf before serving, as its texture remains tough even after cooking. With a potted bay plant at home, you’ll always have a fresh supply ready to enhance your cooking.
Conclusion
Bay leaf from a pot truly means fresh flavor at your fingertips. Growing bay laurel in containers is an easy, space-saving way to enjoy this classic culinary herb year-round. With the right pot, soil, and care, your bay tree will thrive for years, providing both beauty and flavor. Whether on a balcony, patio, or kitchen windowsill, a potted bay plant is a rewarding addition to any gardener’s collection—and a constant source of fresh inspiration in the kitchen.


