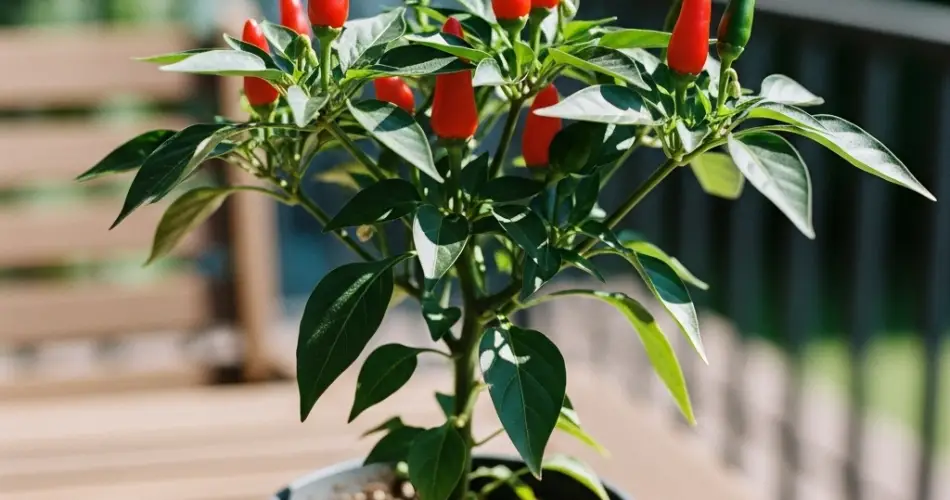
Growing chili peppers on a balcony is a rewarding experience that transforms small spaces into vibrant, productive mini-gardens. Chilies are well-suited for container gardening, and with just a bit of care, you can enjoy a steady supply of fresh, spicy pods right outside your door. Whether you’re a seasoned gardener or a beginner, cultivating chili peppers on your balcony is easy, exciting, and space-efficient.
Why Grow Chilies on a Balcony?
Balconies often receive ample sunlight, which chili peppers love. These heat-loving plants thrive in warm, sunny environments and don’t require a lot of room. Since they grow well in containers, they’re ideal for apartment dwellers and urban gardeners with limited outdoor access. Additionally, growing your own chilies ensures freshness, saves money, and offers the satisfaction of harvesting your own produce.
Choosing the Right Chili Variety
For balcony gardening, compact chili varieties are best. Look for plants that are bushy and don’t grow too tall. Some great options include:
-
Cayenne – Classic long, red chilies that are easy to grow in pots.
-
Thai Bird’s Eye – Small and extremely spicy; perfect for small containers.
-
Jalapeño – Mild to medium heat and prolific yield.
-
Habanero – For those who love extreme heat and have lots of sun.
-
Basket of Fire – A dwarf variety with a colorful mix of fruits, ideal for pots.
Choose based on your heat preference and available space. Many varieties can even double as ornamental plants due to their vibrant colors.
Preparing the Containers
Chili plants need well-draining containers that are at least 10–12 inches deep and wide. For larger varieties, use 5-gallon pots. Ensure there are drainage holes at the bottom to prevent root rot. Grow bags, terracotta pots, and recycled plastic containers all work well.
Place a layer of small stones or broken pottery pieces at the bottom to enhance drainage. This helps avoid waterlogging, which is a common issue in container gardening.
The Best Soil for Balcony Chilies
Use a lightweight, fertile potting mix. A good blend would be:
-
2 parts potting soil
-
1 part compost or worm castings
-
1 part sand, perlite, or coconut coir for aeration
Chili peppers are moderate feeders. Before planting, enrich the mix with a slow-release fertilizer or organic compost. During the growing season, a liquid fertilizer high in potassium (like a tomato feed) supports flowering and fruit development.
Planting and Germinating Seeds
You can start chilies from seeds or buy established seedlings. If using seeds, start indoors 6–8 weeks before the last frost. Sow seeds ¼ inch deep in small pots or trays. Keep them in a warm spot with indirect light and cover with plastic to retain moisture.
Once seedlings have two sets of true leaves, transplant them into larger containers. Make sure the balcony gets at least 6–8 hours of direct sunlight daily, as chilies need warmth and brightness to grow well.
Watering and Light Needs
Chili peppers need consistent but moderate watering. Overwatering is more dangerous than underwatering. Water when the top inch of soil feels dry. Avoid soaking the soil entirely, as soggy roots can kill the plant.
Chilies love sun. Choose the sunniest corner of your balcony. If growing during the rainy season, protect the plants from excessive moisture by moving them under a roof or using a plastic cover.
Supporting Growth and Flowering
As the plant grows, it may need support. Use small stakes or cages to prevent the stems from bending under the weight of the fruit. Pinching off early flower buds can encourage stronger root development and bushier growth early on.
When flowers appear, don’t worry if some fall off—this is natural. To help pollination, gently shake the plant or use a small brush to transfer pollen between flowers.
Feed the plant with a balanced fertilizer every 2–3 weeks once it begins to flower. Organic options like seaweed extract or compost tea also work well.
Pest Management
Common chili pests include aphids, whiteflies, and spider mites. Inspect plants regularly. If needed, spray leaves with neem oil or a mild soap solution. Keeping the balcony clean and removing dead leaves will help prevent infestations.
Harvesting Your Balcony Chilies
Chilies are usually ready to harvest 60–90 days after transplanting. You can pick them green or wait until they turn red, yellow, or orange depending on the variety. Use scissors or a sharp knife to snip the peppers from the plant, leaving a short stem behind.
Harvest regularly to encourage more fruiting. Most chili varieties continue producing throughout the season if properly maintained.
Final Tips
-
Rotate pots occasionally to ensure even sunlight exposure.
-
Don’t overcrowd the balcony; ensure airflow between plants.
-
Overwinter your chili plants indoors if your area experiences frost.
Growing chilies on a balcony is not only possible—it’s practical and fun. With minimal investment and effort, you can enjoy a spicy harvest right outside your window. From fresh salsas to stir-fries, your homegrown chilies will add flavor and heat to your kitchen, all year long.


