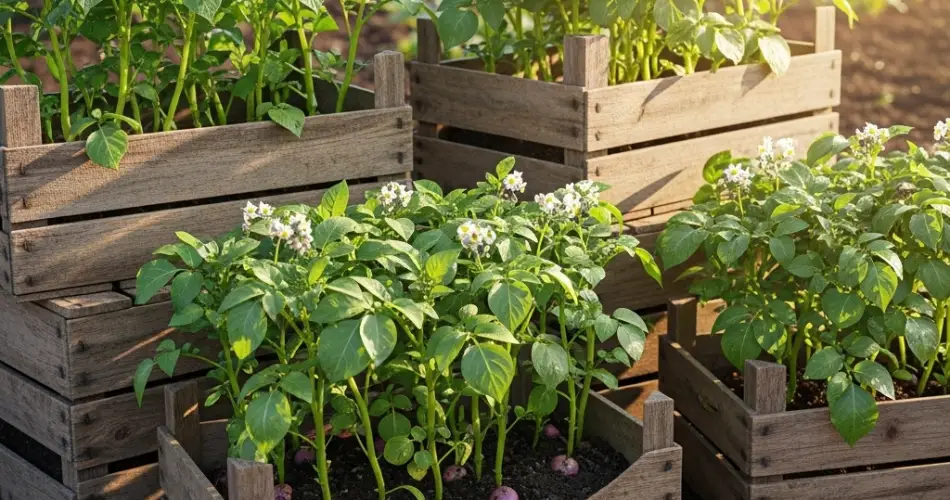
Growing potatoes doesn’t have to mean digging up large garden plots or dealing with unpredictable soil conditions. By using wooden crates, you can create a controlled, efficient, and tidy potato-growing system right in your backyard. This method works well for small spaces, offers easier harvesting, and produces high-quality tubers without the back-breaking labor.
Why Potatoes Thrive in Crates
Potatoes grow underground and need loose, well-drained soil to form healthy tubers. Many gardeners face challenges like clay-heavy soil, poor drainage, or pest problems when planting directly in the ground. Crate gardening solves these issues by lifting the crop above ground level and allowing you to create the perfect growing conditions from scratch.
Key benefits of potato crate gardening:
-
Space-saving for backyards, patios, and even balconies.
-
Excellent drainage to reduce rot and fungal problems.
-
Customizable soil mix for optimal growth.
-
Easier harvesting—no deep digging required.
-
Reduced pest exposure compared to ground planting.
Selecting the Right Crate
A good potato crate must be deep enough to allow tubers to develop while still being easy to handle.
Guidelines for choosing your crate:
-
Depth: At least 14–16 inches.
-
Material: Untreated wood to avoid chemicals leaching into the soil.
-
Strength: Sturdy sides to support heavy soil.
-
Base: Either slatted for drainage or solid with drilled holes.
Line the crate with burlap or landscape fabric to hold the soil in while still letting water drain out. Elevating the crate slightly with bricks or blocks will improve airflow and prolong its lifespan.
Picking Potato Varieties
Your potato choice depends on your preferences and crate size.
-
Early potatoes (e.g., Red Norland, Yukon Gold): Mature quickly and are perfect for smaller crates.
-
Mid-season potatoes (e.g., Kennebec, Purple Majesty): Balanced flavor and storage potential.
-
Late potatoes (e.g., Russet Burbank): Best for storage and larger harvests.
Early varieties are easiest to start with, especially if you’re new to crate gardening.
Preparing the Soil
Potatoes love light, airy soil that’s rich in organic matter. A dense, compact mix will stunt growth.
Recommended soil mix:
-
40% quality garden soil
-
40% compost
-
20% sand or perlite for drainage
Avoid using too much nitrogen fertilizer, as it will encourage leafy growth rather than tuber formation.
Planting Step-by-Step
-
Chit the seed potatoes by placing them in a cool, well-lit spot until sprouts appear.
-
Fill the crate with about 4–6 inches of your soil mix.
-
Place seed potatoes with the eyes facing up, spaced about 8 inches apart.
-
Cover with 3–4 inches of soil.
As the plants grow to about 6–8 inches tall, hill them by adding more soil to cover the lower stems. Continue this process until the soil reaches the top of the crate. This method encourages more tuber growth and prevents sunlight from turning potatoes green.
Watering and Sunlight
Potatoes need consistent moisture, especially while tubers are forming.
-
Water deeply 1–2 times a week, adjusting for rainfall.
-
Keep the soil evenly moist but never soggy.
-
Provide 6–8 hours of sunlight daily for strong growth.
Uneven watering can lead to cracked or oddly shaped tubers, so regular care is essential.
Fertilizing for Best Results
Once the plants are about 6 inches tall, feed them with a low-nitrogen, high-potassium fertilizer to boost tuber production. Potassium helps form plump, healthy potatoes, while too much nitrogen will create excessive foliage.
Pest and Disease Prevention
Although crates reduce certain pest risks, some common issues to watch for include:
-
Colorado potato beetles: Handpick or use organic sprays.
-
Aphids: Spray with water or neem oil.
-
Blight: Space crates apart for airflow and water at the soil level to avoid wetting foliage.
Rotating your potato-growing location each year can help prevent soil-borne diseases.
Harvesting Made Simple
One of the greatest advantages of crate gardening is the ease of harvesting.
-
For new potatoes: Harvest when plants begin flowering. Gently remove the topsoil and pull out the small tubers.
-
For mature potatoes: Wait until plants yellow and die back. This ensures thicker skins for longer storage.
When ready, simply tip the crate over and collect the potatoes. This eliminates the need for heavy digging and reduces the risk of damaging tubers.
Curing and Storage
To store your potatoes for longer:
-
Let them cure in a dark, well-ventilated space for 1–2 weeks.
-
Store at 40–50°F in darkness.
-
Avoid refrigeration, which changes the flavor by converting starch to sugar.
End-of-Season Cleanup
After harvest, empty the crate and compost the soil—especially if any disease was present. Brush out debris and store the crate in a dry place to prevent rot.
Final Thoughts
Backyard crate gardening is an efficient, space-saving, and satisfying way to grow potatoes. With careful soil preparation, consistent care, and smart harvesting techniques, you can enjoy a steady supply of fresh, flavorful potatoes without the challenges of traditional gardening. This method not only fits modern small-space lifestyles but also delivers a rustic charm that makes gardening even more rewarding.


