How to Create an Amazing Flower Pot from Plastic Bottles for Your Garden
Recycling plastic bottles into flower pots is a fun and creative way to reduce waste while enhancing your garden. Instead of discarding used plastic bottles, you can transform them into unique and eye-catching plant containers. These DIY flower pots are not only eco-friendly but also cost-effective and customizable. Whether you want hanging pots, self-watering containers, or decorative planters, plastic bottles offer endless possibilities. In this guide, we will walk you through step-by-step instructions to create amazing flower pots for your garden using plastic bottles.
Why Use Plastic Bottles for Flower Pots?
Using plastic bottles for gardening has several benefits:
- Eco-Friendly: Repurposing plastic bottles reduces waste and minimizes environmental pollution.
- Cost-Effective: Instead of purchasing new pots, you can create them for free using discarded bottles.
- Lightweight and Durable: Plastic pots are easy to move and resistant to breakage.
- Customizable: You can cut, paint, and design the pots in various ways to match your garden’s aesthetics.
- Versatile: They can be used for hanging planters, vertical gardens, self-watering pots, and more.
Materials Needed
Before you start, gather the following materials:
- Empty plastic bottles (1-liter, 2-liter, or larger)
- Sharp scissors or a craft knife
- Sandpaper (optional, for smooth edges)
- Acrylic paints, spray paint, or markers for decoration
- Paintbrushes
- Nail or screwdriver (for making drainage holes)
- Rope or wire (for hanging pots)
- Potting soil and plants of your choice
- Decorative items such as stickers, beads, or fabric (optional)
- Glue gun (optional, for additional decorations)
Step-by-Step Guide to Making a Plastic Bottle Flower Pot
Step 1: Choose and Prepare Your Plastic Bottle
- Select a plastic bottle based on the plant size. A larger bottle is suitable for bigger plants, while smaller bottles work well for herbs and flowers.
- Wash the bottle thoroughly with soap and water to remove any residue.
- Remove the label by soaking the bottle in warm water for a few minutes and peeling it off.
Step 2: Cut the Bottle
- Decide on the pot shape. Here are a few popular designs:
- Traditional Pot: Cut the bottle in half and use the bottom half as a planter.
- Hanging Planter: Cut the bottle horizontally and attach strings to create a hanging basket.
- Self-Watering Pot: Cut the bottle into two sections. Flip the top half upside down inside the bottom half and insert a piece of cloth or cotton as a wick for water absorption.
- Animal or Character Design: Cut the top portion in the shape of a cat, rabbit, or any fun shape for a cute decorative pot.
- Use sandpaper to smooth out any rough or sharp edges.
Step 3: Make Drainage Holes
- Use a nail, screwdriver, or heated metal rod to poke small holes in the bottom of the pot. This ensures proper drainage and prevents root rot.
- If making a self-watering pot, avoid making holes at the bottom, but ensure the wick touches the water.
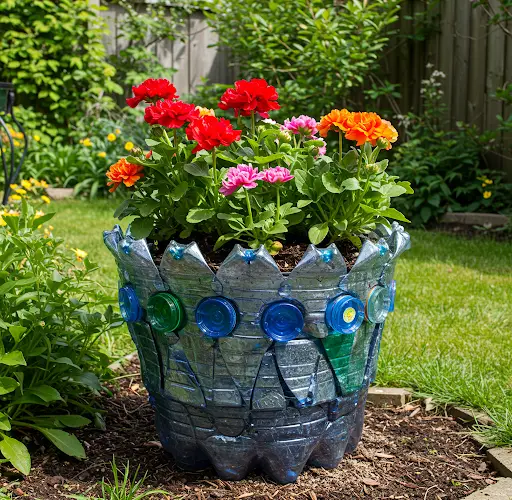
Step 4: Decorate the Flower Pot
- Paint the exterior of the bottle using acrylic or spray paint. Choose bright colors or patterns to make the pot visually appealing.
- Add decorative elements such as stickers, beads, or fabric using a glue gun.
- If creating an animal or themed pot, paint facial features and details with a brush or markers.
- Allow the decorations to dry completely before adding soil and plants.
Step 5: Add Soil and Plant Your Flowers
- Fill the plastic bottle pot with potting soil, leaving some space at the top.
- Choose plants that suit the pot size, such as flowers, herbs, or small succulents.
- Gently plant the flowers or seedlings and press the soil lightly around them.
- Water the plant lightly and place the pot in an appropriate location with adequate sunlight.
Step 6: Hang or Arrange Your Flower Pots
- If making a hanging pot, attach ropes or wires to the top of the bottle and hang it on a wall, balcony, or fence.
- For self-watering pots, ensure the bottom section has enough water to keep the soil moist.
- Arrange multiple bottle pots in a vertical or horizontal layout to create a unique garden display.
Tips for Success
- Choose the Right Plants: Use shallow-rooted plants for small bottles and larger plants for bigger containers.
- Monitor Watering Needs: Plastic retains moisture, so adjust watering accordingly to prevent overwatering.
- Use UV-Resistant Paint: If placing the pots outdoors, use UV-resistant paint to prevent fading.
- Recycle Creatively: Experiment with different shapes, colors, and styles to make your garden stand out.
- Incorporate Vertical Gardening: Attach bottle pots to a wooden frame or wire mesh for a space-saving vertical garden.
Conclusion
Making flower pots from plastic bottles is a fantastic way to repurpose waste while adding charm to your garden. With just a few simple steps, you can create unique, durable, and eye-catching plant containers. Whether you want an artistic touch with painted designs, a functional self-watering pot, or a vertical garden arrangement, plastic bottle planters offer endless creative opportunities. Try this DIY project today and turn your garden into a colorful and eco-friendly paradise!


