Aloe vera is more than just an attractive succulent—it’s a powerhouse plant packed with medicinal properties. From soothing minor burns and cuts to moisturizing skin and aiding digestion, aloe has earned a permanent place in natural wellness routines. Growing aloe vera in containers is a smart, space-saving solution that brings this healing plant within arm’s reach, whether on your windowsill, balcony, or kitchen counter.
This guide covers everything you need to grow, maintain, and harvest aloe vera in pots, transforming it into your personal home remedy station.
Why Aloe Vera is a Must-Have Plant
Aloe vera (Aloe barbadensis miller) is a succulent native to arid climates, known for its thick, fleshy leaves filled with a soothing, gel-like sap. This gel contains vitamins, enzymes, and amino acids that are commonly used to treat skin irritation, burns, and dryness. The juice, when processed correctly, may also support digestion and boost immunity.
Having your own potted aloe vera plant ensures you always have access to fresh gel when you need it—without preservatives or additives.
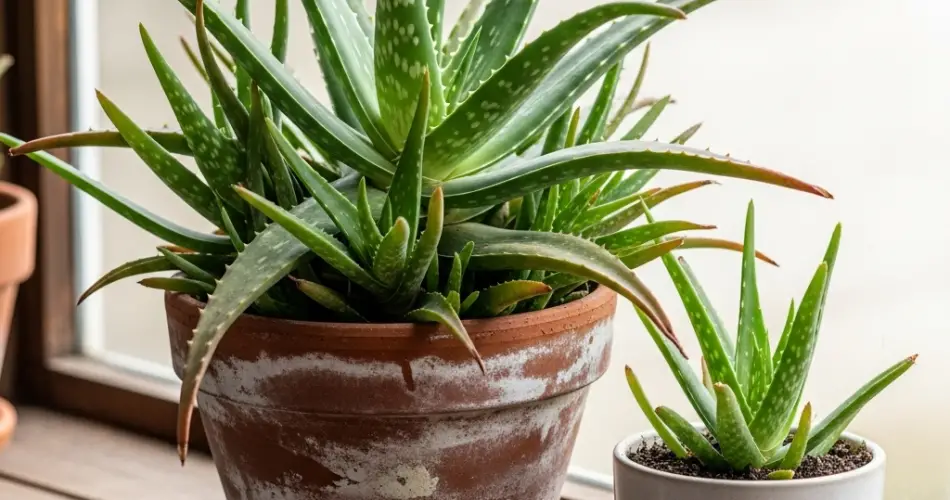
Choosing the Right Pot and Soil
Aloe vera thrives in containers, but selecting the right pot and soil is crucial for its health.
Pot Selection
-
Drainage is key: Always use a pot with drainage holes to prevent water from sitting in the soil.
-
Material matters: Terra cotta or clay pots are ideal, as they allow excess moisture to evaporate more quickly than plastic or ceramic containers.
-
Size: Choose a pot that comfortably accommodates the plant’s root system, with a bit of space for growth. Aloe prefers slightly tight quarters over too much space.
Soil Mix
A well-draining soil mix is essential to prevent root rot. Use a cactus or succulent soil blend, or create your own mix by combining:
-
2 parts potting soil
-
1 part coarse sand
-
1 part perlite or pumice
Avoid moisture-retentive mixes or those with a lot of peat moss.
Light Requirements
Aloe vera needs plenty of light to thrive. Position your potted plant where it will receive at least 6 hours of bright, indirect sunlight daily. A south- or west-facing window is usually ideal.
If grown outdoors, aloe can handle full sun, but gradual exposure is best to avoid sunburned leaves. In very intense sunlight, the leaf tips may brown slightly—this is normal, but if entire leaves turn orange or brown, move the plant to a spot with filtered light.
In low-light conditions, aloe vera will stretch toward the light, becoming leggy and weak. Supplement with a grow light if necessary.
Watering Aloe Vera in Pots
One of the most common mistakes with aloe is overwatering. As a desert plant, it stores water in its leaves and prefers to dry out between waterings.
Watering Guidelines
-
Spring and summer: Water every 2–3 weeks, depending on humidity and temperature.
-
Fall and winter: Water less frequently, about once a month or when the soil is completely dry.
Check the soil before watering. Insert your finger at least 2 inches deep—if it’s dry, it’s time to water. Water thoroughly until it drains out of the bottom, then discard any excess water from the saucer.
Fertilizing
Aloe vera isn’t a heavy feeder, but it benefits from occasional fertilization during its active growing season.
-
Use a balanced, diluted liquid fertilizer once every 4–6 weeks during spring and summer.
-
Avoid fertilizing during fall and winter, when growth slows naturally.
General Maintenance
-
Remove dead leaves: Trim off dried or damaged leaves at the base using clean scissors.
-
Rotate the pot every couple of weeks for even sun exposure and balanced growth.
-
Wipe dust from leaves with a soft, damp cloth to allow for better photosynthesis.
Harvesting Aloe Gel
When your plant is mature (typically after 1–2 years), you can begin harvesting the gel:
-
Choose an outer, fully grown leaf—these contain the most gel.
-
Cut it cleanly at the base.
-
Let the yellowish sap (aloin) drain out—this bitter substance can be irritating to skin or stomach.
-
Slice open the leaf and scoop out the clear gel with a spoon.
-
Use immediately or store in the refrigerator for a few days.
Repotting and Propagation
Aloe vera will eventually outgrow its pot or produce “pups”—small offsets that grow at the base of the mother plant.
To repot:
-
Gently remove the plant and inspect the roots.
-
Repot in fresh succulent soil if roots are cramped or soil is exhausted.
To propagate:
-
Separate pups with a clean knife, ensuring each has roots.
-
Let them dry for a day, then plant in small pots with dry soil.
-
Water sparingly until new growth appears.
Final Thoughts
Growing aloe vera in containers is simple, rewarding, and practical. It requires little maintenance, thrives on neglect, and doubles as a natural first aid kit. Whether you keep it in the kitchen, on a balcony, or in the living room, this hardy plant delivers both beauty and benefits—making it an excellent addition to any home garden setup.


