Introduction: Orchids are renowned for their stunning beauty and elegance, making them a popular choice among plant enthusiasts. While many people buy established orchid plants, propagating orchids from a single leaf can be a rewarding and cost-effective way to expand your orchid collection. In this article, we will take you through the process of multiplying an orchid from a single leaf, offering tips and insights to help you succeed in this rewarding endeavor.
Materials Needed: Before you begin propagating your orchid from a single leaf, gather the following materials:
- Healthy Orchid Plant
- Sharp, Sterilized Scissors or Pruners
- Small Pots or Containers
- Potting Mix (Orchid-Specific)
- Rooting Hormone (Optional)
- Transparent Plastic Bag or Plastic Wrap
- Labels for Identification
- Spray Bottle (for misting)
Step-by-Step Guide:
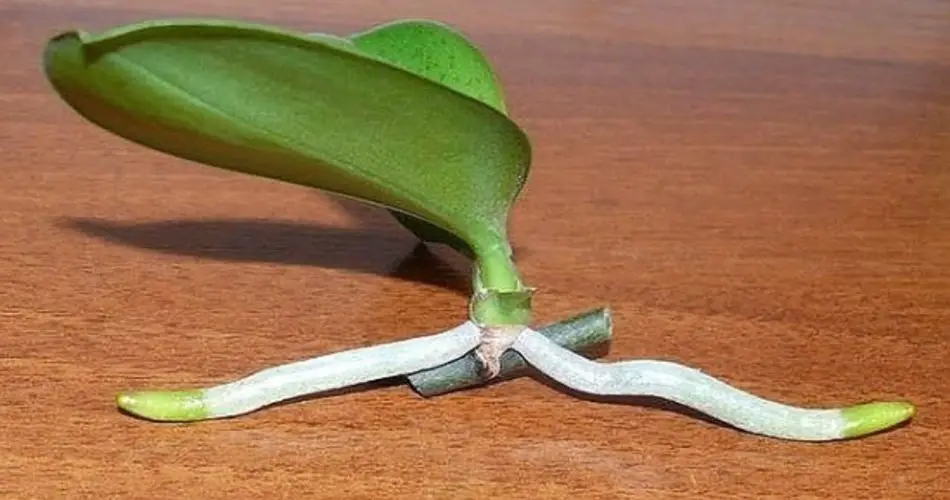
- Select a Healthy Leaf: Start by choosing a mature, healthy leaf from your orchid plant. Ensure it is free from any signs of disease or pest damage. The selected leaf should be green and plump.
- Cut the Leaf: Using sterilized scissors or pruners, carefully cut the selected leaf into sections, with each section containing a vein running through it. Each section should be approximately 2-3 inches long.
- Apply Rooting Hormone (Optional): While not mandatory, applying a rooting hormone to the cut ends of the leaf sections can promote faster root development. Dip the cut ends into the rooting hormone, following the product’s instructions.
- Prepare the Potting Mix: Fill small pots or containers with orchid-specific potting mix. Make sure the potting mix is well-draining and suitable for orchids.
- Plant the Leaf Sections: Gently insert the cut end of each leaf section into the potting mix, burying them about an inch deep. Ensure that the leaf sections are planted at a slight angle.
- Create a Mini Greenhouse: Cover the pots with a transparent plastic bag or plastic wrap to create a mini greenhouse effect. This helps maintain humidity and create an ideal environment for root development.
- Maintain Humidity: Place the pots in a bright, indirect light location, away from direct sunlight. Mist the inside of the plastic bag or plastic wrap regularly to keep the humidity levels high.
- Monitor Growth: Check the pots regularly for signs of root development and new growth. It may take several weeks to months for roots and new shoots to emerge.
- Transplant Seedlings: Once the new orchid plantlets have developed substantial roots and shoots, carefully transplant them into individual pots filled with orchid-specific potting mix.
- Care for the Young Orchids: Provide proper orchid care, including appropriate watering, light, and temperature conditions, to ensure the healthy growth of your newly propagated orchids.
Conclusion: Multiplying an orchid from a single leaf can be a fascinating and rewarding process for any orchid enthusiast. With patience and care, you can expand your orchid collection and enjoy the beauty of these exquisite plants. Follow the steps outlined in this guide, and you’ll be well on your way to successfully propagating orchids from single leaves. Happy orchid growing!


