Keeping your shower clean can sometimes feel like an impossible task. Even the most diligent cleaning routines often leave behind stubborn stains, mineral deposits, and unpleasant odors. The good news is that there’s a simple, natural, and inexpensive solution that can make your shower gleam without the need for harsh chemicals. The secret ingredient? Vinegar.
Understanding Common Shower Stains
Anyone who owns a shower knows the frustration of dealing with persistent stains. These marks can appear on tiles, glass doors, and shower trays, and they often seem impossible to remove. There are several common types of stains that can affect showers, and knowing their origins helps in tackling them effectively.
1. Limescale: This is one of the most common problems in areas with hard water. Limescale forms when mineral deposits, such as calcium and magnesium, accumulate on surfaces like tiles, showerheads, and trays. These deposits adhere firmly to surfaces, making them difficult to remove with standard cleaning agents.
2. Mold and mildew: Damp, warm environments like showers are the perfect breeding ground for mold and mildew. These fungi not only leave dark, unsightly marks but can also pose health risks if left unchecked. Removing them requires a solution that can penetrate and disinfect surfaces effectively.
3. Rust stains: Rust can develop from metal fixtures, screws, or drain grates exposed to water over time. These reddish-brown stains are often tricky to clean because they result from oxidation and can penetrate porous surfaces.
4. Soap scum and shampoo residue: Soap, shampoo, and shaving foam can leave behind a film that dulls the shine of your shower. These residues may not always be highly visible, but over time, they build up and contribute to an overall dirty appearance.
Given the variety of stains, it’s easy to see why showers can appear grimy even when cleaned regularly. Fortunately, there’s an effective method that addresses all these common issues in a natural, inexpensive way.
Why Vinegar Works Wonders
Vinegar is a household staple that has long been recognized for its versatility and cleaning power. Its acidic properties make it particularly effective against mineral deposits, such as limescale, while also offering natural disinfectant qualities that help kill germs and bacteria.
The acetic acid in vinegar dissolves mineral buildup on shower surfaces, restoring their shine without scratching or damaging them. Additionally, vinegar helps break down mold and soap scum, making it easier to wipe surfaces clean. When used regularly, it can even prevent future mineral deposits from forming, keeping your shower looking fresh over time.
Not only is vinegar effective, but it is also eco-friendly. Unlike chemical cleaners, vinegar is biodegradable and non-toxic, making it safe for both the environment and human health. It provides a cost-effective alternative to commercial cleaning products that often contain harsh chemicals.
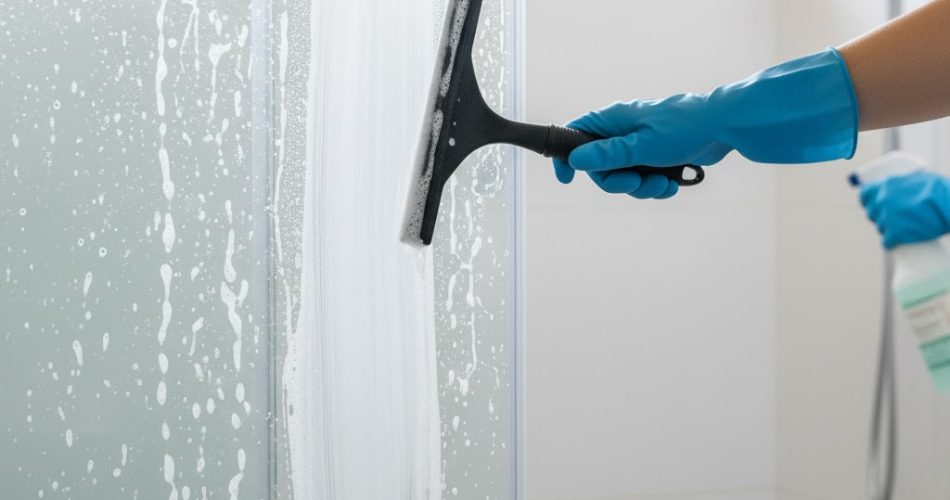
How to Clean Your Shower with Vinegar
To clean your shower using vinegar, you don’t need anything fancy—just plain white vinegar and water. However, it’s important to dilute the vinegar to avoid damaging sensitive surfaces. A safe and effective ratio is one part vinegar to one part water.
-
Prepare the solution: Mix equal parts of white vinegar and water in a spray bottle. This allows for easy application on tiles, glass, and shower trays.
-
Apply the mixture: Spray the vinegar solution generously over the areas you want to clean. Focus on surfaces with visible limescale, mold, or soap residue.
-
Let it sit: Allow the solution to sit for several minutes. This gives the vinegar time to break down mineral deposits and loosen grime. For extremely stubborn stains, you can leave it for 10–15 minutes, but avoid leaving it too long on delicate surfaces.
-
Scrub gently: Using a soft cloth, sponge, or non-abrasive brush, gently scrub the treated areas. You’ll notice that mineral deposits, soap scum, and mildew begin to lift away.
-
Rinse thoroughly: After scrubbing, rinse the shower surfaces thoroughly with warm water to remove any remaining vinegar residue.
-
Dry: Wipe down surfaces with a clean cloth or towel. This step prevents water spots and helps maintain a sparkling finish.
It’s crucial to test the vinegar solution on a small, inconspicuous area before applying it broadly, especially on sensitive materials like natural stone or specialty coatings. This ensures that the vinegar won’t cause discoloration or etching.
Additional Tips for Maintaining a Clean Shower
Using vinegar regularly is an excellent preventive measure. Spraying your shower with a diluted vinegar solution once a week can help prevent limescale, soap scum, and mold from accumulating. Pairing vinegar with regular wiping and ventilation will keep your shower cleaner for longer.
For added effectiveness, you can combine vinegar with baking soda to tackle tough stains. Sprinkle a small amount of baking soda onto the surface, then spray the vinegar solution over it. The resulting fizzing action helps lift even the most stubborn deposits.
Benefits of Using Vinegar
-
Cost-effective: Vinegar is inexpensive compared to commercial cleaning products.
-
Eco-friendly: It’s biodegradable and non-toxic.
-
Versatile: Works on limescale, mold, soap scum, rust stains, and more.
-
Preventive: Regular use reduces future buildup.
-
Safe for health: No harsh chemicals that can irritate skin or respiratory systems.
Final Thoughts
Maintaining a clean and sparkling shower doesn’t have to be a daunting task. By using vinegar, a natural, affordable, and highly effective ingredient, you can remove stubborn stains and odors while protecting both your health and the environment. Whether it’s limescale, mold, rust, or soap scum, vinegar provides a simple solution that works.
Next time you see your shower looking dull or grimy, reach for a bottle of vinegar instead of harsh chemicals. With consistent use and a few minutes of effort, your shower can remain spotless and hygienic without you even noticing the hard work.